This teriyaki chicken recipe delivers that irresistible, glossy, restaurant-style flavor you crave; savory, sweet, and packed with umami. It’s quick enough for a weeknight but special enough to serve for guests. With just one pan and a few chef-tested techniques, you’ll have a bold, balanced dish that’s miles ahead of takeout—ready in about 30 minutes.
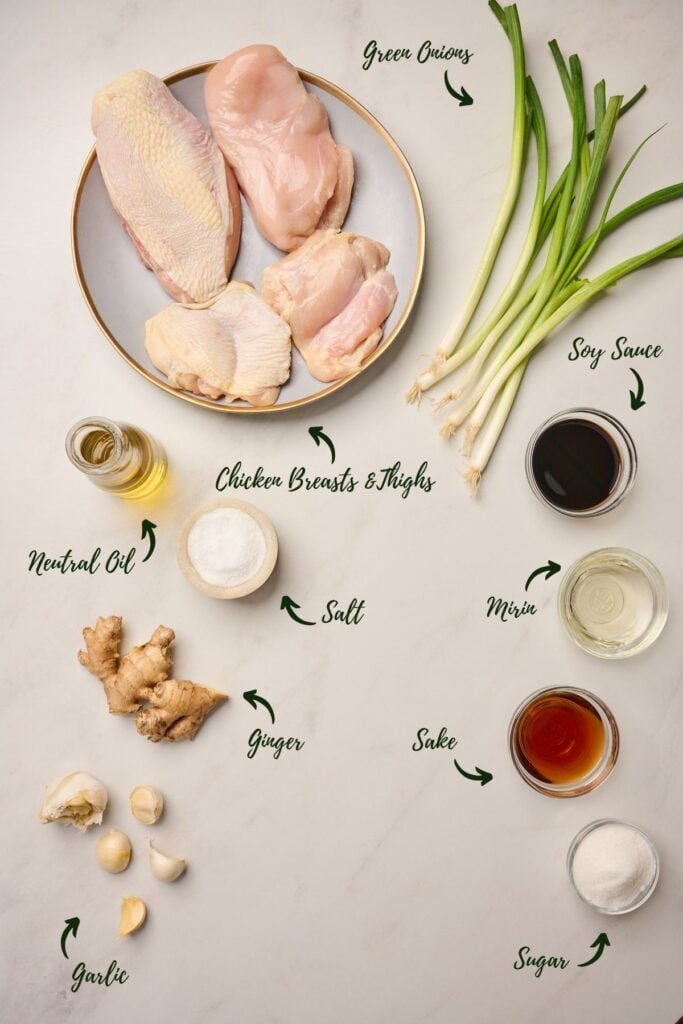
This recipe comes together with boneless chicken breasts or thighs (skin-on or skinless), low-sodium soy sauce, mirin, sake, sugar, fresh garlic, ginger, and scallions. That’s it—no unnecessary thickeners, just a commitment to authentic ingredients and classic cooking techniques.
Teriyaki is a culinary technique, not just a bottled sauce, and it’s a method I’ve perfected in the kitchen. Unlike most recipes that use cubed stir-fry meat, we use whole chicken breasts or thighs. This is the first secret to achieving a superior result: cooking the chicken whole results in a deeper, more even sear, which locks in moisture for exceptionally juicy meat and provides the option of unbelievably crispy skin.
The second secret is my process, which is rooted in classic chef’s technique. We first build a rich, caramelized crust on the chicken through a proper sear. Then, an authentic sauce is created and reduced in the same pan until it becomes a thick, glossy glaze—no cornstarch required. Finally, we continuously baste the chicken with that glaze, a professional’s trick that builds layer upon layer of addictive, umami-rich flavor.
Chef’s Ingredient Notes
Teriyaki is a classic Japanese cooking technique that involves grilling or broiling food with a sweet, soy-based glaze. The word “teriyaki” originates from the words “teri” (meaning “to shine” or “to glaze”) and “yaki” (meaning “to grill” or “to broil”). While it traditionally began as a method for glazing fish in Japan, it has become a beloved staple worldwide, most famously used for chicken. This recipe honors the authentic sauce and techniques to create the most swoon-worthy, easy-to-make restaurant-level chicken!
Your Guide to Choosing the Best Chicken for Teriyaki
Both chicken thighs and breasts work beautifully in this recipe, but your choice will shape the final dish.
- Why I Use Whole Chicken Pieces (Not Cubes): Unlike many recipes, this method uses whole chicken pieces. This is a crucial technique for a few key reasons:
- Moisture Retention: Whole pieces have less exposed surface area, which helps them stay significantly juicier than small cubes.
- Better Flavor: Searing a larger, flat surface develops a more uniform and flavorful crust through the Maillard reaction.
- Professional Presentation: Slicing the perfectly cooked chicken just before serving creates a beautiful, restaurant-style look.
- The Case for Skin-On Chicken (Chef’s Recommendation): For maximum flavor and moisture, I highly recommend using skin-on chicken. As the skin sears, it renders fat, creating a rich, savory flavor and an unbelievably crispy crust that gets beautifully lacquered by the glaze. This rendered fat also naturally bastes the meat as it cooks, keeping it exceptionally juicy.
Using Skinless Chicken: If you prefer a leaner option, skinless chicken is a good choice. However, because it lacks the protective skin, it is more prone to drying out, so you will need to be mindful during the searing process.
The Authentic Teriyaki Sauce Quartet
A traditional Japanese teriyaki sauce is built on a “golden ratio” of four essential ingredients: two parts soy sauce, two parts sake, two parts mirin, and one part sugar. This formula strikes the perfect balance of salty, sweet, and umami flavors.
Soy Sauce: Use a quality, low-sodium soy sauce to control the saltiness of the final dish. For a gluten-free option, tamari is an excellent substitute; you can also use coconut aminos for a soy-free alternative.
Sake: This dry Japanese rice wine adds umami and complexity. If you don’t have it, you can substitute it with dry sherry or Chinese rice wine.
Mirin: A sweet Japanese rice wine that is crucial for flavor and gives the sauce its signature glossy finish. If you can’t find it, a good substitute is a dry sherry with about a teaspoon of sugar added per tablespoon to mimic the sweetness.
Sugar: We use granulated sugar for its neutral taste. Honey or maple syrup can be used (though not traditional), but they add their distinct flavors and tend to burn more easily when searing at high heat.
Essential Aromatics and Oil
- Fresh Garlic & Ginger: These are non-negotiable for authentic flavor. While pre-minced products are convenient, they often have a muted, briny taste and lack the vibrant pungency of fresh aromatics. I use smashed garlic cloves instead of minced, since minced garlic tends to burn quickly over high heat. Smashed cloves infuse the sauce gently and can be left in or removed before serving.
Chef’s Tip: Keep ginger root in your freezer for easy access. It grates much more easily when frozen (no need to peel!) and prevents the stringiness of fresh ginger. - Neutral Oil: A high-smoke-point oil, like avocado oil, canola, or vegetable oil, is essential. It allows you to get a hot, hard sear on the chicken without the oil burning or interfering with the flavor of the sauce.
- Scallions: Also known as green onions, these add a mild, sweet onion flavor when sautéed in the sauce and provide a pop of fresh color and texture when sliced raw for garnish.
How to Make Teriyaki Chicken (A Step-by-Step Visual Guide)
This visual guide walks you through my signature “sear, reduce, and glaze” technique, which elevates this teriyaki chicken from basic to chef-level. Follow these steps, paying close attention to the sensory cues, to achieve a perfect, restaurant-quality result every time.
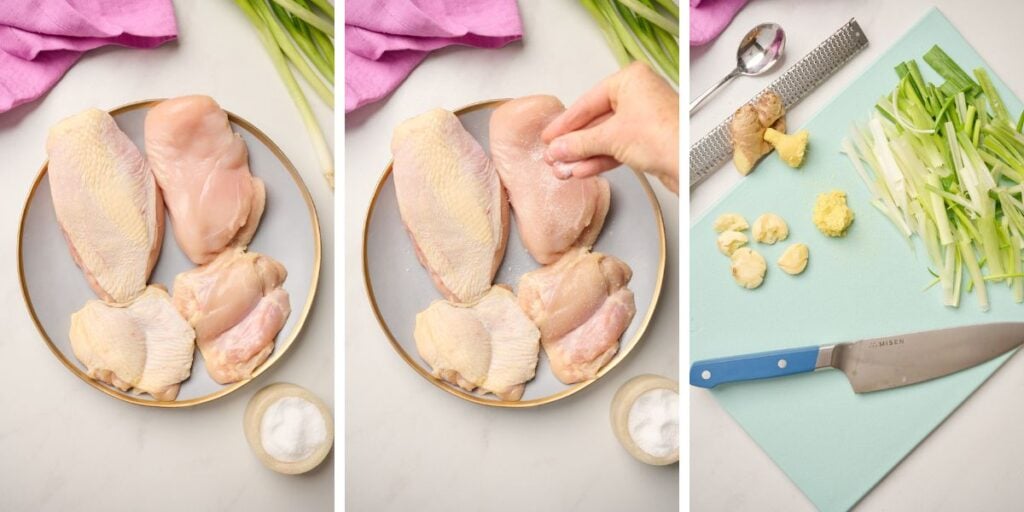
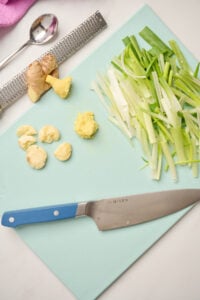
Prep the Chicken and Aromatics
First, pat the chicken completely dry and season it with salt. A dry surface is essential for a crispy crust. Next, prepare your aromatics: smash the garlic, grate the ginger (a microplane is excellent for this), and cut the green onions into two-inch strips.
Chef’s Tip: Frozen ginger grates easily without peeling and offers a finer texture with less stringiness
Optional Marination: For a deeper flavor, you can marinate the chicken overnight in the sauce ingredients. If you do, be sure to reserve that marinade to use as the sauce base.Short on time? You can skip this step and still get incredible results by building the sauce directly in the pan.
Prefer to grill? This recipe adapts beautifully to the grill. Marinate as directed, then cook the chicken over medium-high heat, turning as needed until it’s seared and cooked through. During the final minutes, baste with the reduced sauce to build a sticky, flavorful glaze.
Sear the Chicken for a Golden Crust
Heat a large sauté pan over high heat with neutral oil. Once the oil shimmers and lets off a wisp of smoke, add the chicken skin-side down (or smooth-side down for skinless). Cook undisturbed for 4–5 minutes. You are listening for a steady sizzle and looking for a deep golden-brown crust—that’s the Maillard reaction building rich, layered flavor.
Important: Don’t move or flip the chicken prematurely. Once the crust forms, it will naturally release from the pan. Searing whole chicken pieces (as opposed to cubes) allows for a crisp crust while retaining moisture inside.

Build the Sauce and Baste
Reduce the heat to low and flip the chicken. Add the smashed garlic cloves, ginger, green onions, soy sauce, mirin, sake, and sugar. Using whole cloves prevents burning and allows the garlic to gently infuse the sauce as it simmers. Cover the pan and cook until the chicken is cooked through—about 7 minutes for thighs or 10–12 minutes for breasts. The trapped steam gently finishes the cooking. During this time, baste the chicken 2-3 times by spooning the hot sauce over the top to build layers of flavor.
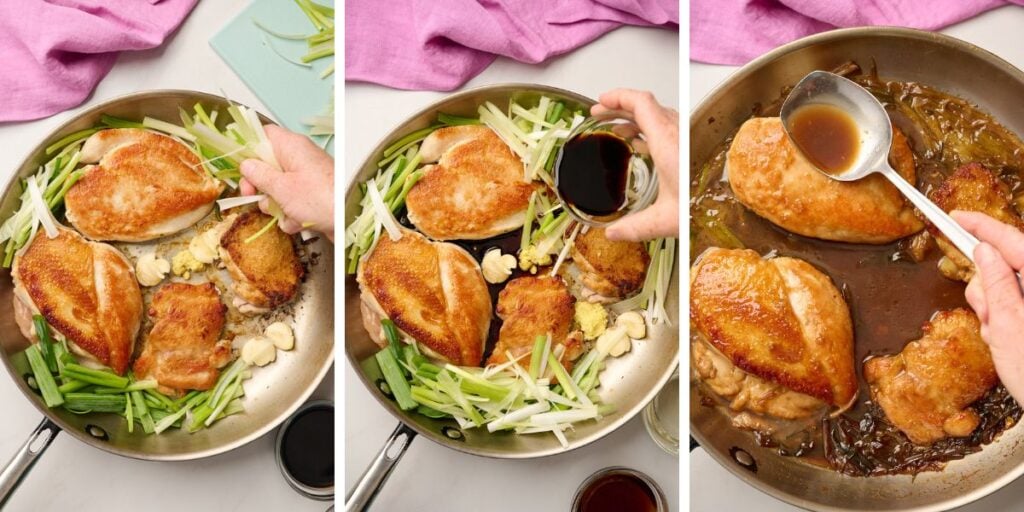
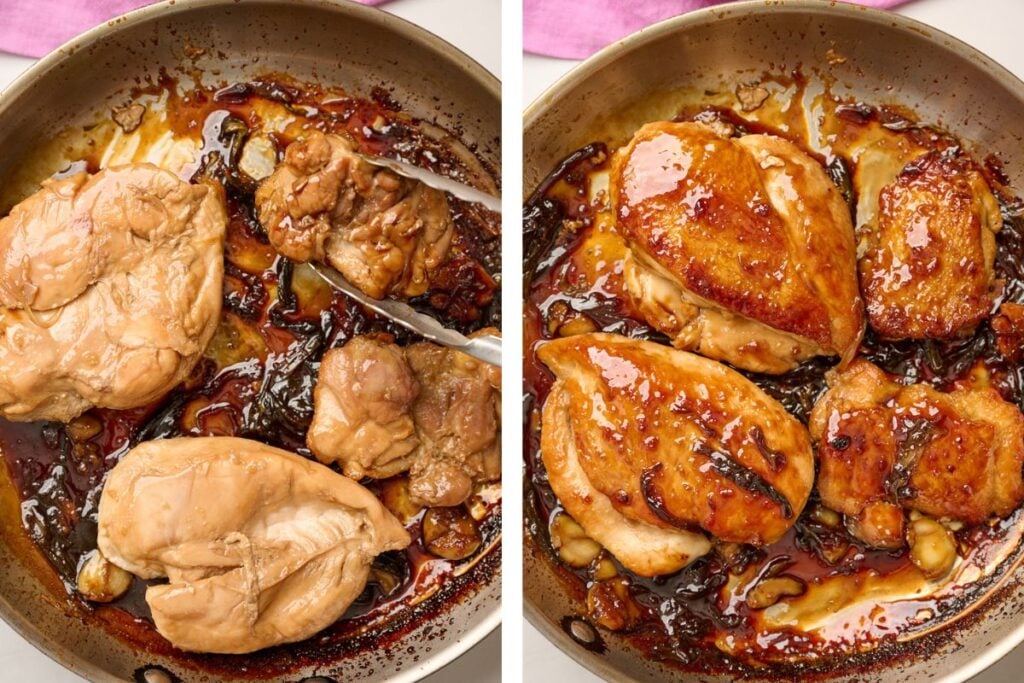
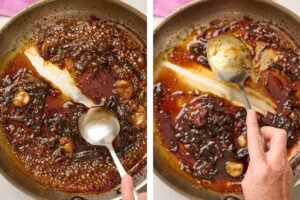
Reduce the Sauce into a Glaze
Once the chicken is cooked through (no longer pink inside), remove it to a plate or cutting board and let it rest for a few minutes. Resting allows the juices to redistribute throughout the meat, ensuring a tender bite.
Meanwhile, turn the heat under the pan to high and simmer the sauce uncovered. As the liquid reduces, the sugars will caramelize, creating a thick, glossy glaze. You’ll know it’s ready when you can draw a spoon through it and it leaves a brief trail, and the sauce coats the back of the spoon.
If the sauce thickens too quickly or becomes sticky or grainy, immediately lower the heat and stir in a tablespoon of water or sake to loosen it. This will help return it to a silky, pourable consistency without sacrificing flavor.

Glaze, Garnish, and Serve
Return the rested chicken to the pan. Tilt the pan and use a large spoon to continuously scoop the glaze over the chicken, coating every piece on both sides. This infuses flavor into the chicken and builds a lacquered finish.
If you opted to grill the chicken, you can spoon the reduced glaze over the sliced meat just before serving for that same sticky, glossy finish.
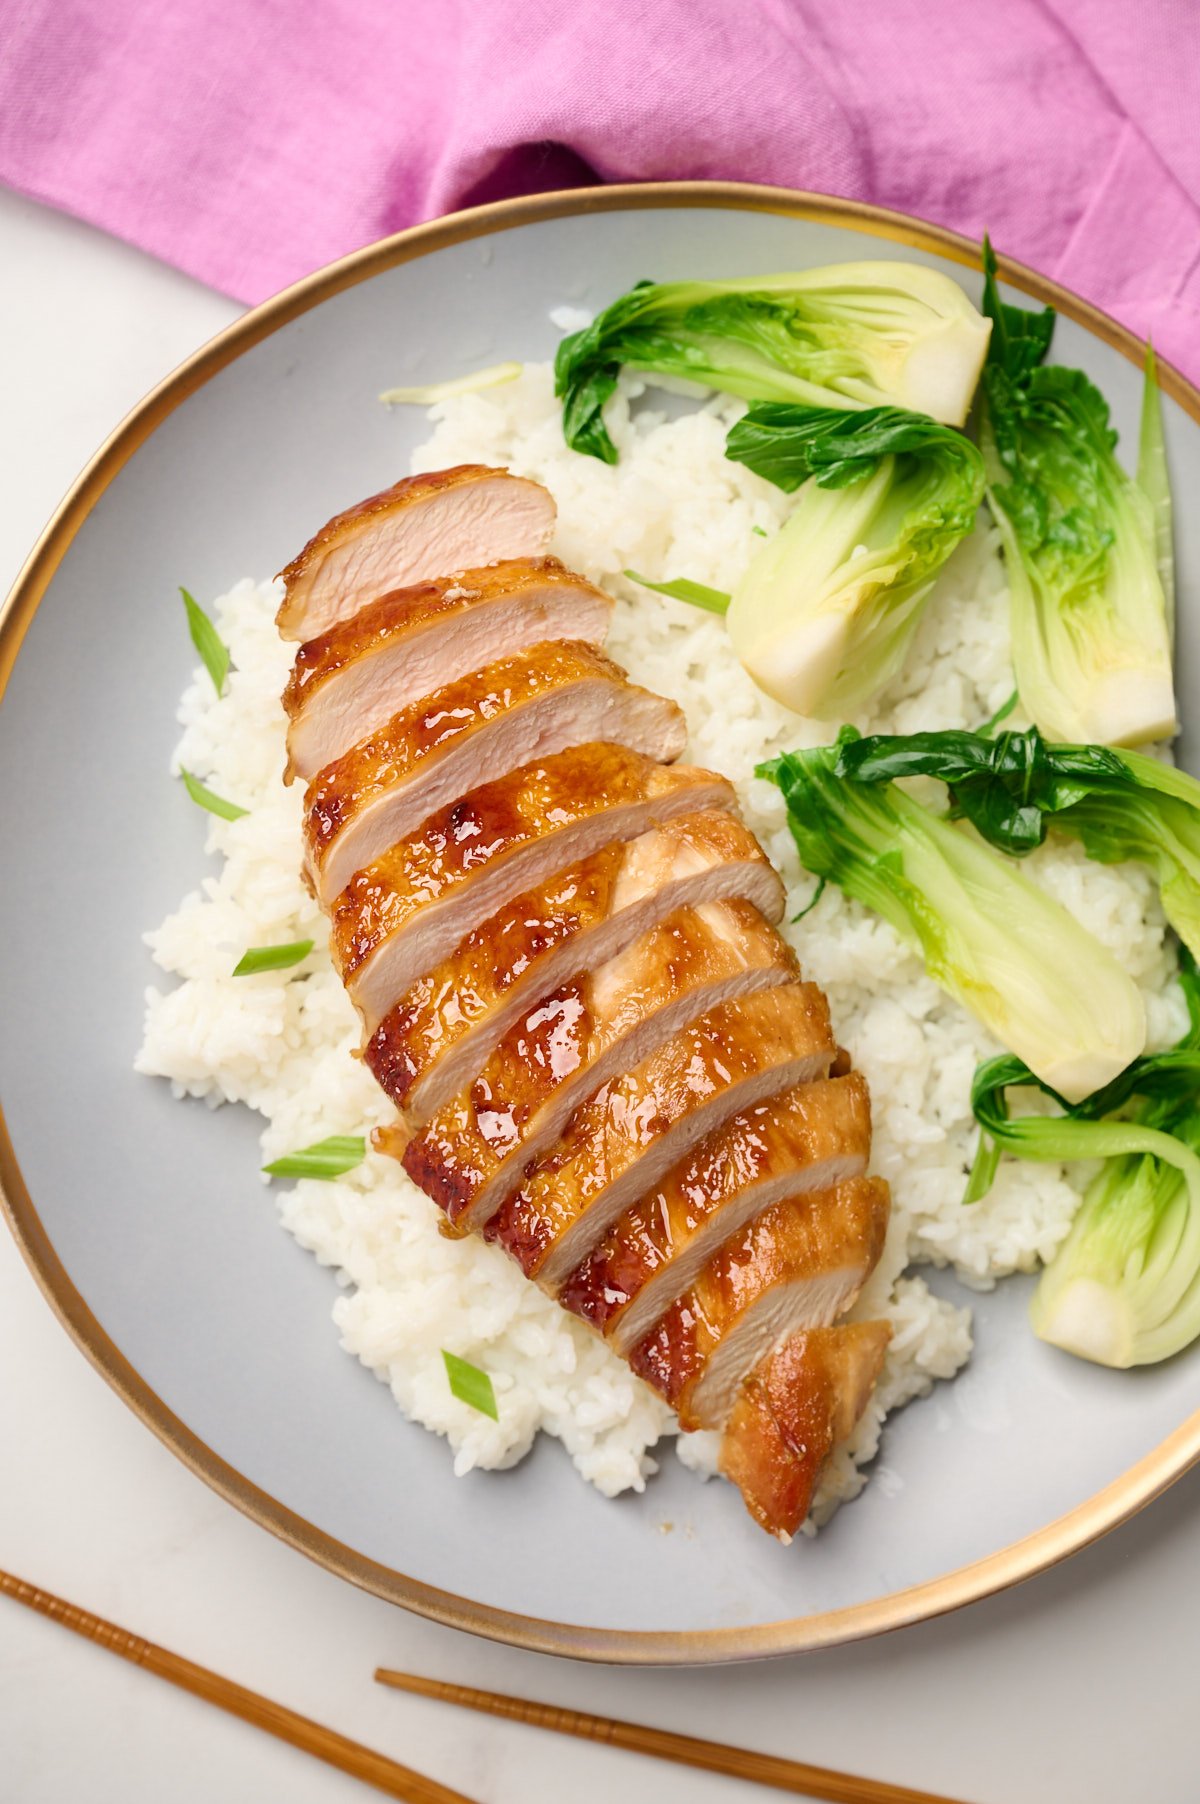
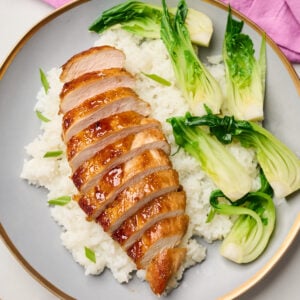
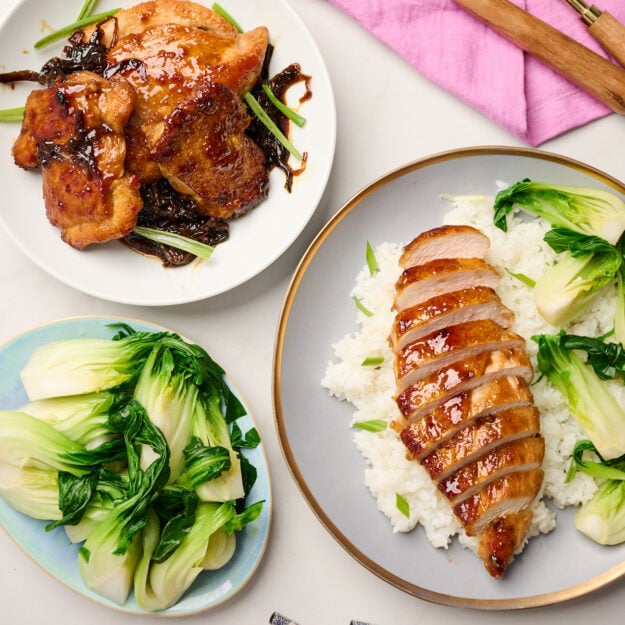
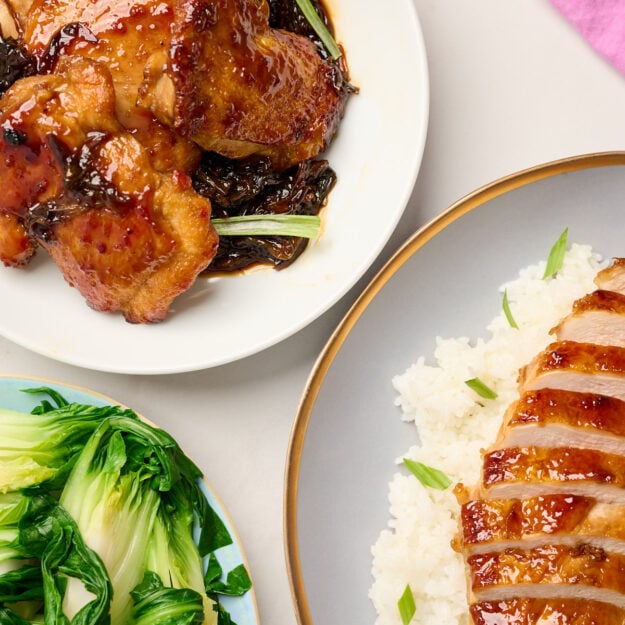
Slice the chicken, garnish with fresh green onions, and serve immediately over rice, noodles, or vegetables. You can leave the garlic cloves in the glaze for added flavor, or remove them before serving for a cleaner presentation.

Best Teriyaki Chicken Recipe
Equipment
Ingredients
- 2 lbs boneless chicken breasts or thighs (skin-on or skinless, any combination)
- 2 tbs neutral oil (grapeseed, avocado, canola, or vegetable)
- 4 cloves garlic, smashed
- 1-inch piece piece ginger, peeled and finely minced
- 6 green onions, cut into 2-inch strips (reserve some for garnish)
- 1/4 cup low-sodium soy sauce
- 1/4 cup mirin
- 1/4 cup sake
- 2 tbs cane sugar
Instructions
- Optional (Marinate): For added depth, marinate the chicken overnight in the garlic, ginger, scallions, soy sauce, mirin, sake, and sugar. Save the marinade to use as the sauce base.

- For both methods, pat the chicken dry and then season with salt. Dry chicken sears best.

- Heat a large sauté pan over high heat. Add oil and let it get hot (about 2 minutes). Place chicken in the pan—skin-side down (or smooth-side down for skinless). Cook undisturbed for 4–5 minutes until a golden crust forms.
- Reduce heat to low. Flip the chicken and add the smashed garlic cloves along with the ginger, scallions, soy sauce, mirin, sake, and sugar. Using whole garlic cloves prevents burning and gently infuses the sauce as it simmers. Cover and cook until the chicken is cooked through—about 7 minutes for thighs, 10–12 minutes for breasts. Baste the chicken 2–3 times during cooking.

- Transfer the chicken to a plate and increase heat to high. Simmer the sauce uncovered for about 5 minutes, until glossy and thick enough to coat the back of a spoon.
- Return the chicken to the pan and spoon the glaze evenly over the top, coating both sides with the sauce. You can leave the garlic cloves in the glaze for extra flavor or remove them before serving for a smoother finish. Garnish with sliced green onions and serve immediately.


Notes
- Sake Substitute: Use dry sherry, Chinese rice wine, or unsalted chicken broth.
- Mirin Substitute: Mix dry sherry or white wine with ½–1 tsp sugar per tablespoon.
- Internal Temperature: Chicken is done when it reaches an internal temp of 165°F.
- Serving Tip: Slice the chicken and fan it out on a platter for a beautiful presentation. Spoon extra glaze over the top before serving.
- Make-Ahead Tip: The sauce can be made up to 3 days ahead and stored in the fridge. Reheat gently before glazing.
Nutrition
Serving Suggestions
This teriyaki chicken is incredibly versatile. Its rich, savory-sweet glaze pairs wonderfully with a variety of sides, allowing you to build a complete and satisfying meal. Here are some of my favorite ways to serve it:
Salads: For a fresh and crisp contrast to the rich glaze, pair the chicken with a simple Japanese cucumber salad. If you’re looking for something heartier, this crunchy Brussels sprouts salad works wonderfully as a refreshing slaw.
Vegetables: To complement the main dish, consider a flavorful vegetable side. This savory miso eggplant adds another layer of umami that pairs beautifully with the teriyaki. Alternatively, a simple side of tender baby bok choy or this easy turnip recipe makes for a perfect, well-rounded meal
Carbohydrates and Creative Pairings: Create a classic teriyaki bowl by serving the chicken over a bed of fluffy steamed rice or savory egg fried rice to soak up the glaze. For a lighter base, healthy shirataki noodles are an excellent choice. If you want to build a more expansive meal, the chicken can also be served alongside other dishes, such as these Vietnamese banh xeo (savory crepes) or as a protein component in a bun thit nuong noodle salad bowl.
Storing and Reheating Leftovers
Properly storing your teriyaki chicken ensures it will be just as delicious for lunch or dinner the next day.
Refrigerator: Place leftover chicken in an airtight container and store in the refrigerator for up to 4 days. For best results, store the chicken and rice in separate containers to prevent the rice from getting soggy.
Freezer: You can also freeze the cooked chicken for more extended storage. Place it in a freezer-safe container or Ziploc bag and freeze for up to 3 months. For easier individual meals, consider freezing in single-serving portions.
Note: While freezing is a great option, be aware that the texture of the sauce may change slightly upon reheating.
Reheating: The best way to reheat this chicken is gently in a skillet over low heat. You may want to add a splash of water or broth to loosen the sauce as it warms up. Alternatively, you can reheat it in the microwave until warmed through.
More Chef-Tested Chicken Recipes You’ll Love
If you enjoyed this teriyaki chicken, you’ll love these other chicken recipes that balance bold flavor with professional technique. Each one highlights a different preparation style—from brothy soups to crispy cutlets—so there’s something for every mood and menu.
- Cozy up with a bowl of my chicken tortilla soup, a smoky, brothy favorite packed with tender shredded chicken, sweet corn, and just the right amount of heat.
- For a satisfying weeknight dinner, try my green chicken enchiladas, where juicy chicken is rolled in corn tortillas and baked under a homemade roasted tomatillo sauce until bubbly and golden.
- Craving comfort with a Japanese twist? This chicken katsu curry features a crispy, golden-fried cutlet paired with a rich, savory Japanese curry—crunchy on the outside, tender inside.
- Want to master your knife skills? Follow my step-by-step guide on how to debone a chicken, a practical technique every home cook should have in their toolkit.
- If you’re looking for a simple yet stunning dish, my chicken ballotine is stuffed, rolled, and roasted to perfection—an impressive centerpiece with very little fuss.
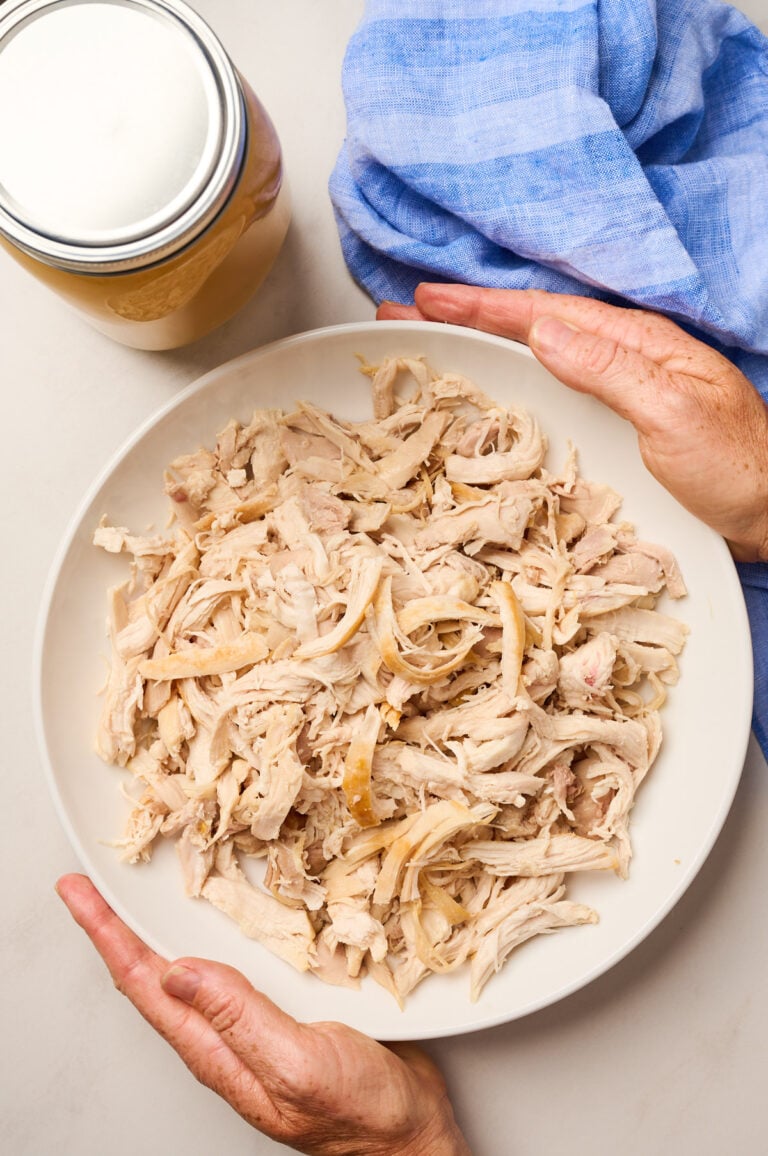
- And for quick, flavorful meal prep, don’t miss my shredded chicken recipe, which teaches you how to poach or sear chicken for tender, juicy results every time.