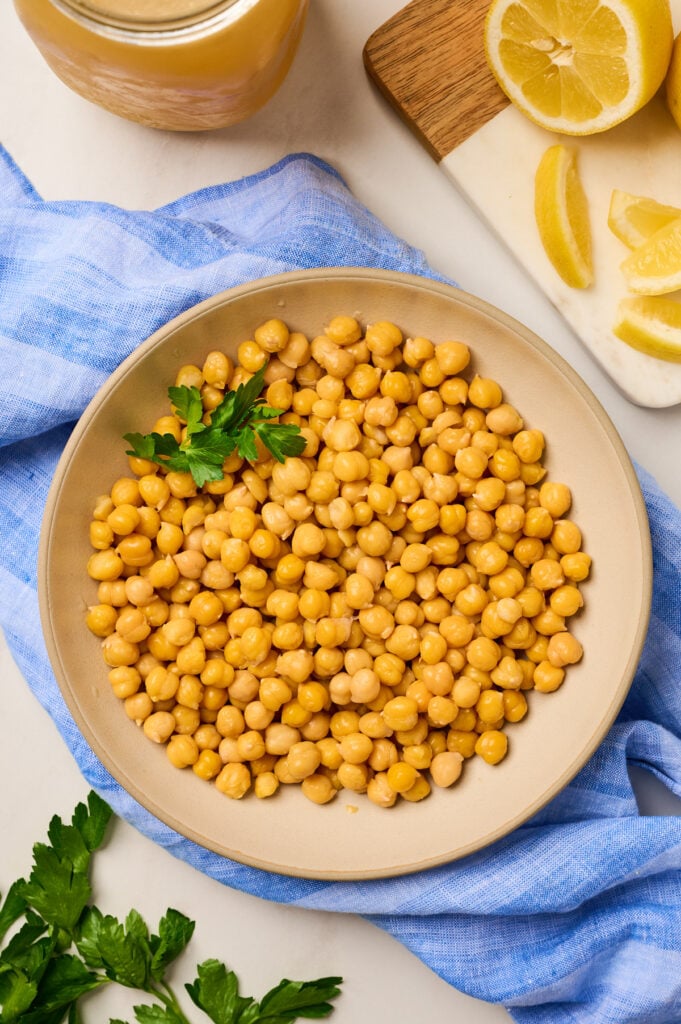
This chef-tested guide shows you how to cook chickpeas from dried beans for perfect texture and flavor—using stovetop, Instant Pot, or slow cooker—plus how to make a savory chickpea broth you’ll actually want to save. You’ll learn the best way to soak, when to salt, and optional pro techniques (like baking soda and skin removal) for extra-creamy, hummus-worthy chickpeas.
After cooking thousands of beans behind the line at Mario Batali’s Lupa in New York City, I learned from my executive chef that beans are deceptively hard to cook well. They may seem simple, but getting that perfectly creamy, tender texture takes real technique—and a few key decisions that most recipes skip.
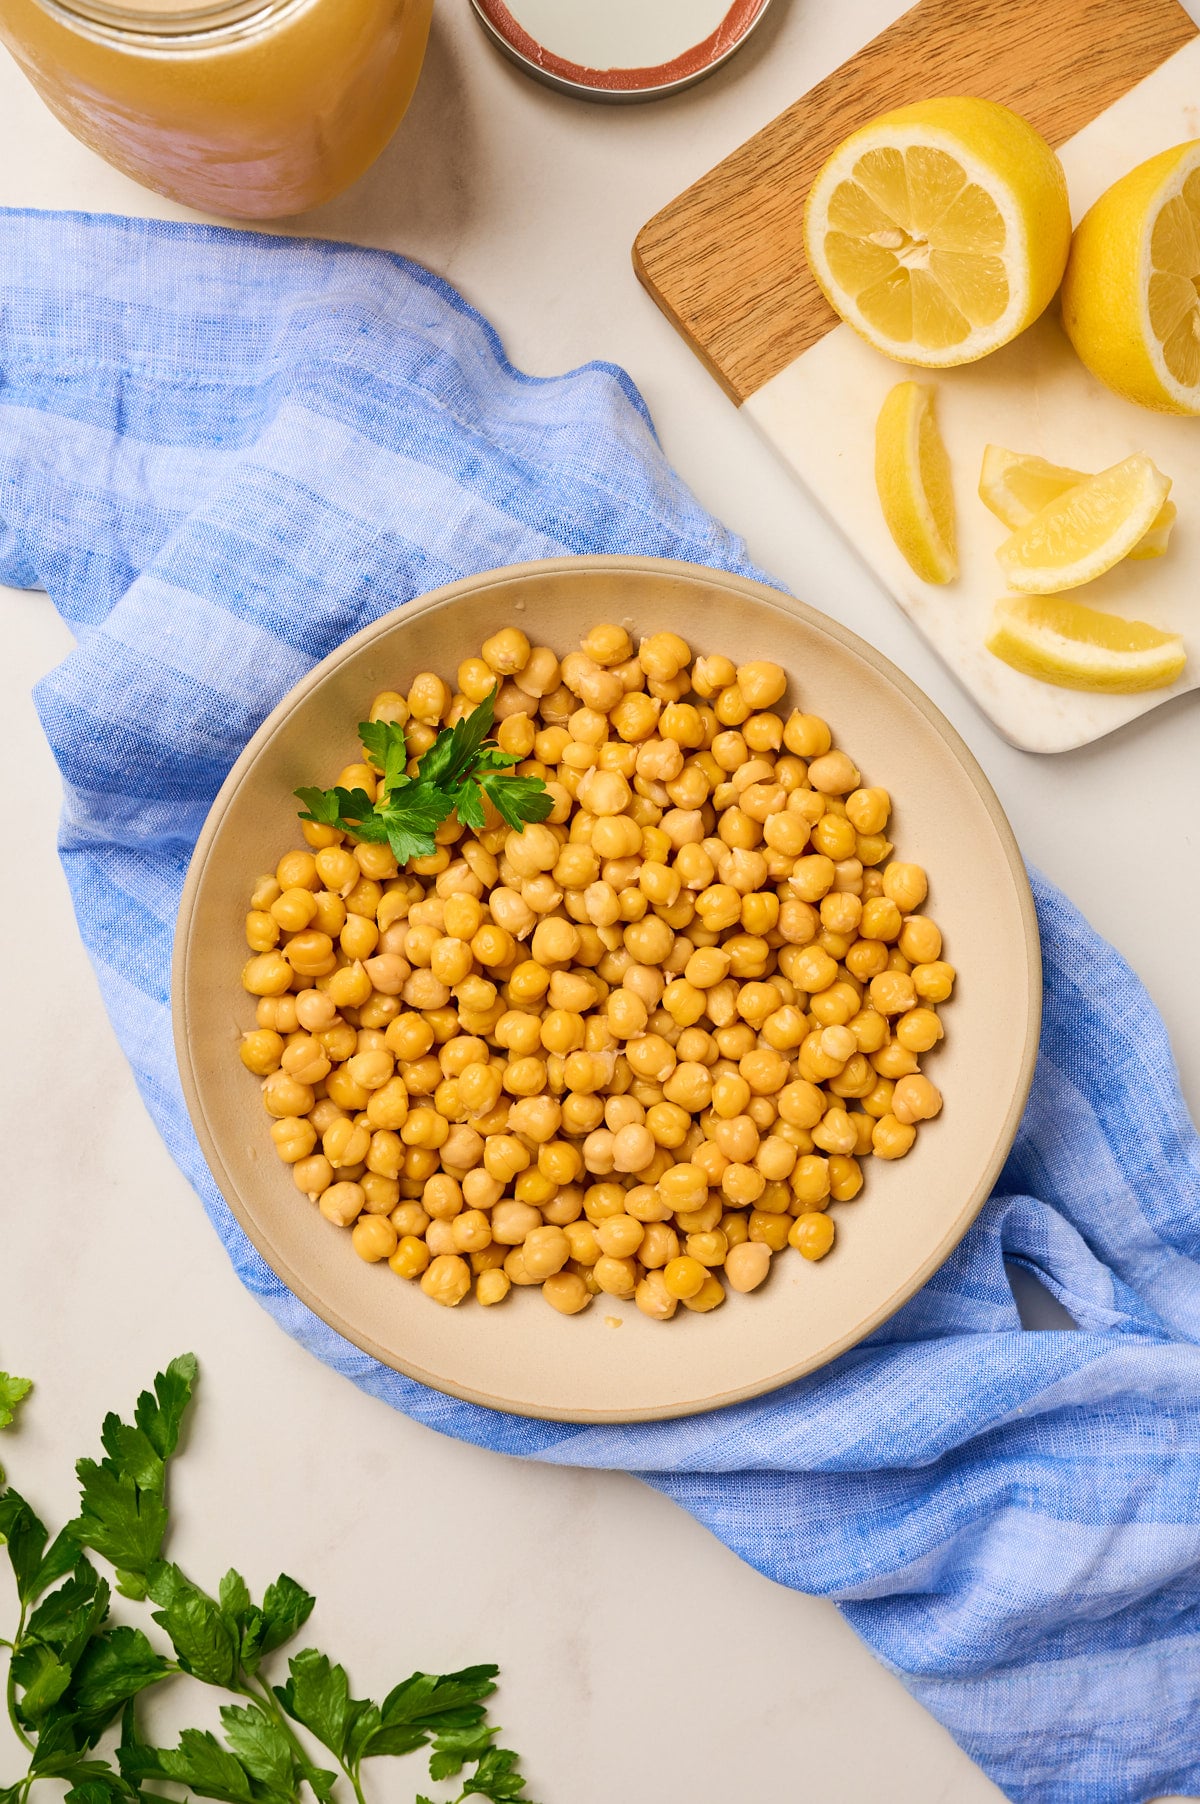
Homemade chickpeas are far more flavorful, economical, and nutritious than canned. Once you master them, they’re incredibly versatile: fold them into my cucumber tomato salad, mix them into tabouli salad, or blend them into the creamiest homemade hummus.
Whether you’re meal-prepping for the week or leveling up your salads, dips, and bowls, learning how to cook chickpeas from scratch is one of the easiest ways to add satisfying, healthy plant protein to your meals.
Table of Contents
Why Start with Dried Chickpeas?
Rinse and Sort Chickpeas Before Cooking
Why Soak Chickpeas Before Cooking?
Should You Soak Chickpeas with Salt or Baking Soda?
How to Cook Chickpeas (3 Methods)
Optional Step – Remove Chickpea Skins
Flavor Variations for Cooking Chickpeas
Recipes to Use Your Cooked Chickpeas
How to Store and Freeze Cooked Chickpeas
Why Start with Dried Chickpeas?
If you’ve only used canned chickpeas, switching to dried ones is a significant yet straightforward upgrade that delivers major flavor and texture improvements. When cooked properly, they’re creamier, nuttier, more nutritious, and significantly more flavorful—worlds apart from canned beans.
Bonus: You also get a rich, naturally thick chickpea broth (think vegetarian bean broth) that adds depth to soups, sauces, and grains.
Cooking from scratch also gives you complete control over seasoning. You can infuse your chickpeas with aromatics, herbs, and spices to create completely customizable flavor profiles.
Nutritionally, dried chickpeas retain more vitamins and minerals and are naturally low in sodium. You skip the preservatives and chemicals and get more of the good stuff: fiber, folate, and essential minerals like magnesium and potassium.
Whether you’re blending hummus or tossing chickpeas into soups and salads, starting with dried gives you better flavor, better texture, and more control.
Rinse and Sort Chickpeas Before Cooking
Before soaking or cooking, give your dried chickpeas a quick rinse and visual check to remove any tiny stones, pebbles, dust, debris, or wrinkled peas that may be present. This process ensures you’re only cooking the best beans.
How to do it:
- Rinse in a fine-mesh strainer under cool running water.
- Spread them out and remove any stones, debris, or shriveled beans.
It takes less than a minute, and saves you from any negative surprises later.
Why Soak Chickpeas Before Cooking
Best results: soak overnight. Short on time: use the quick soak.
Soaking dried chickpeas isn’t just tradition; it’s a smart, science-based technique. It softens the beans, reduces cooking time, and improves both texture and digestion.
- Faster, more even cooking: Soaking softens the outer layer so water and heat penetrate evenly—fewer burst beans, fewer undercooked centers.
- Improved digestibility: Chickpeas contain oligosaccharides, natural carbohydrates that can cause gas and bloating. Soaking helps draw some of these into the water.
- Creamier texture: Hydrated chickpeas cook more uniformly, yielding a smoother, more tender bite—especially great for hummus.
Bonus: Soaking can also reduce phytic acid, which may improve mineral availability.

Should You Soak Chickpeas with Salt or Baking Soda?
There’s debate about whether to salt chickpeas during the soaking process. Salt is said to help soften the skin by replacing minerals like calcium and magnesium, leading to more even hydration and fewer split skins.
However, after testing both methods, I found that unsalted soaks taste better. Salted chickpeas tend to absorb more of the aromatics in the cooking liquid, which can mute that natural chickpea flavor. For me, an unsalted soak delivers a cleaner, nuttier result.
What about baking soda? Some cooks soak chickpeas in baking soda to loosen the skins, which can result in a creamier texture in dishes like hummus. I don’t recommend this method during soaking. Instead, I use a small amount right before cooking (warming soaked chickpeas briefly) for better control and cleaner flavor.
Three Soaking Methods
Each of these methods rehydrates dried chickpeas and helps loosen their skins. Choose the option that fits your schedule.
Why It Matters: Chickpeas contain oligosaccharides—water-soluble complex carbohydrates (sugars) that can cause gas and bloating. They also contain naturally occurring compounds like phytates (which can reduce mineral absorption), lectins, and saponins (which can taste bitter). During soaking, many of the oligosaccharides—and some bitter compounds—leach into the water. That’s why you should discard the soaking water, drain and rinse well, then cook chickpeas in fresh water for cleaner flavor and better digestion.
Overnight Soak (My Preferred Method – Easy & Effective)
Time: 8–12 hours (overnight)
Water: Cover by 2–3 inches of cold water
- Rinse and sort 1 pound of chickpeas.
- Place in a large bowl and cover with water.
- Soak in the fridge for 8–12 hours.
- Drain and rinse well.
Quick Soak (Boil & Rest)
Time: About 1 hour (plus a quick boil)
Water: Cover by 2–3 inches of water
- Rinse and sort chickpeas.
- Add to a pot and cover with water.
- Bring to a boil for 1–2 minutes.
- Remove from heat, cover, and let sit for 1 hour.
- Drain and rinse thoroughly.
Instant Soak (Pour-Over Boil)
Time: 1 hour
Water: 6:1 water-to-bean ratio (boiling water)
- Rinse chickpeas and place in a heatproof bowl.
- Pour boiling water over the chickpeas (6:1 ratio).
- Cover and soak for 1 hour.
- Drain and rinse well.
Note: Chickpeas will expand 2–3x while soaking—use a large bowl.
Ingredient Notes
These core ingredients create a broth that’s not only deeply flavorful but also enhances the texture and taste of the chickpeas themselves; no fluff here, just what matters and why.
Chickpeas are also called garbanzo beans—same ingredient, different name.
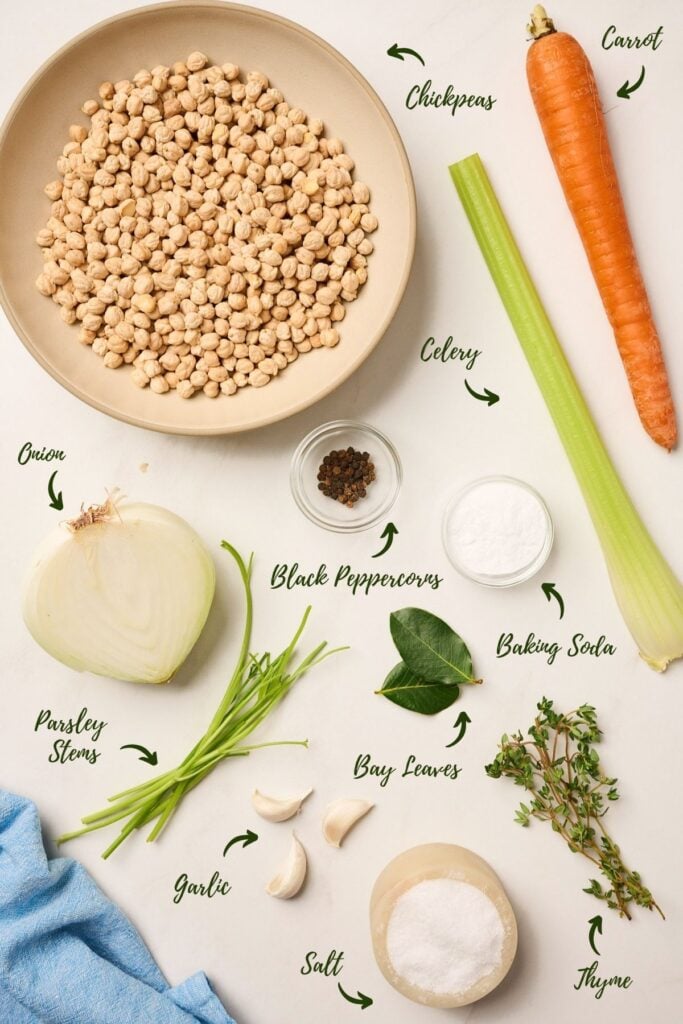
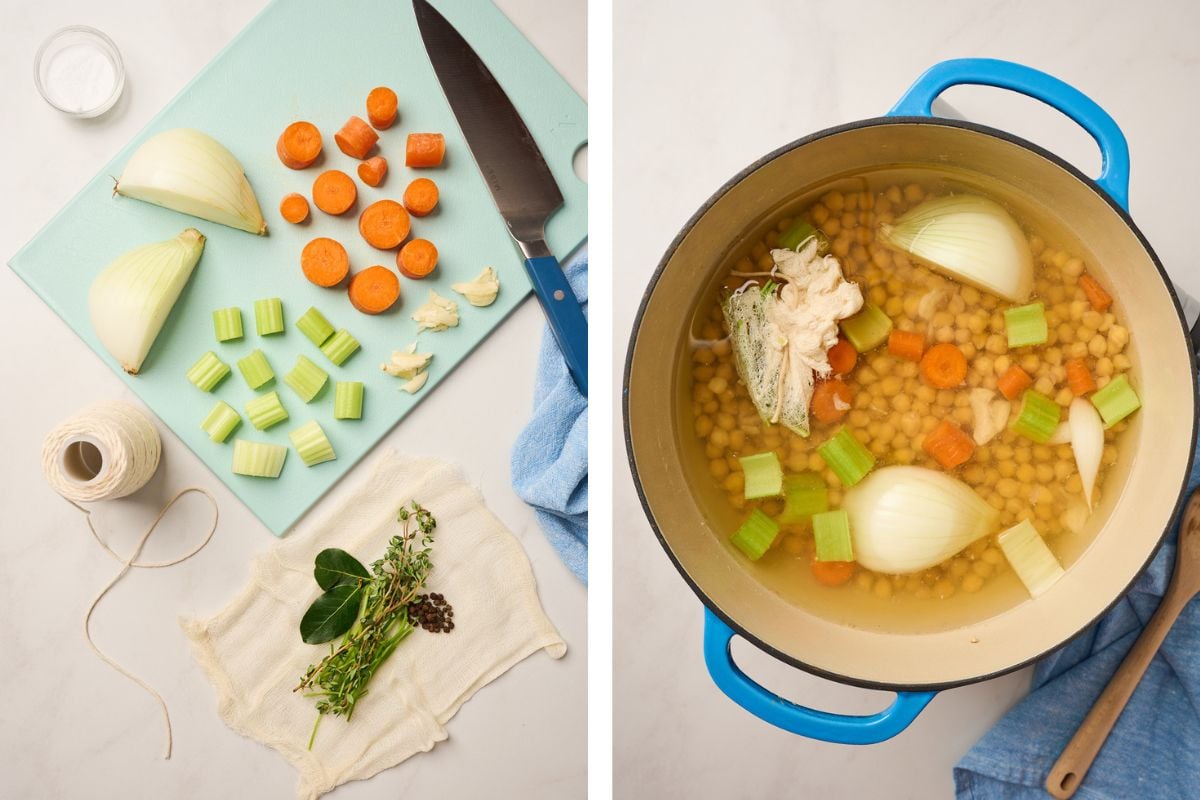
Mirepoix + Garlic (Carrot, Celery, Onion, Garlic): This classic French base creates subtle sweetness and aromatic depth. I always include garlic cloves for a rounder, more savory flavor that infuses the broth as it simmers. For variations, try shallots for added sweetness, dried chilies for a kick of heat, and citrus peel to brighten the flavor.
Bouquet Garni – (Bay Leaf, Thyme, Parsley Stems, Peppercorns): If you’re using a fresh bay leaf, one is plenty, it’s more potent than dried. Always use parsley stems (not leaves), the leaves will make the liquid bitter. Whole black peppercorns add the perfect amount of bite. For other cuisines, try cilantro stems, lemongrass, or ginger.
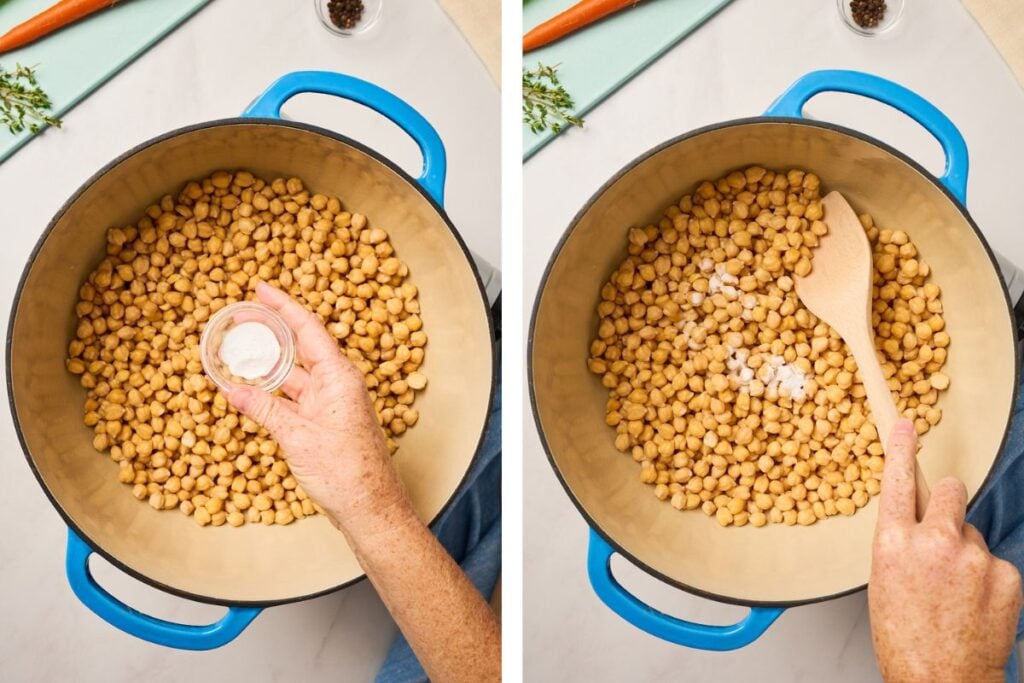
Kosher Salt: Salt is essential, not just for flavor, but to help the chickpeas cook evenly and absorb seasoning from the inside out. I recommend 1 tablespoon of kosher salt per 4 cups of water but don’t add it at the start. Follow the method below for the exact timing (it’s key for peak flavor and ideal texture).
Water (or Flavor Boosters): Water keeps things clean and neutral, but if you want to elevate the flavor, consider adding a splash of low-sodium chicken stock, white wine, or even a hint of cream for richness. These additions subtly enhance the broth without overpowering the chickpeas.
How to Cook Chickpeas (Stovetop, Instant Pot, or Slow Cooker)
Once your chickpeas are soaked and drained, you’re ready to cook. Whether you choose stovetop, Instant Pot, or slow cooker, these methods will yield perfectly tender chickpeas and a light, flavorful broth.
Choose your method:
- Stovetop: best flavor + most control (ideal if you want to nail texture)
- Instant Pot: fastest + hands-off (great for weeknight meal prep)
- Slow Cooker: gentlest cook + great for big batches (deep, delicate broth)
Quick Water + Yield Guide: For 1 lb dried chickpeas, use about 8 cups (2 quarts) water—or enough to cover by 2–3 inches. 1 cup dried chickpeas = about 3 cups cooked (1 lb dry yields ~6 cups cooked).
Optional Pre-Step (Recommended for Creamier Texture): Warm soaked chickpeas with 1 tsp baking soda for 2–3 minutes, stirring regularly. The friction and alkaline coating help loosen the skins, leading to a creamier, smoother final texture.
Stovetop (Preferred Method – Best Flavor & Broth)
I prefer this precision method. You can taste the chickpeas as they cook, add salt at the right moment, and skim the broth for impurities—things you can’t do mid-cook in an Instant Pot.
Prep the Aromatics and Herbs: Add your chopped aromatics and bouquet garni to the pot for a clean, savory broth. (The herb satchel makes it easy to remove everything neatly at the end.)
Add to Pot: Place the soaked chickpeas (or optionally the baking-soda pre-step chickpeas) in a large pot and cover with 2–3 inches of cold water. Measure your water, because it determines how much salt you’ll add later (1 tablespoon kosher salt per 4 cups of water). Add the aromatics and herb satchel.
Bring to a Simmer: Bring to a gentle boil, then reduce immediately to a simmer. Avoid aggressive boiling, which can cause chickpeas to burst. Chickpeas should gently bob in the water—not bounce.
The Salt Window (75% Cooked): After 30 minutes, taste the chickpeas. You’re looking for this: tender inside, still slightly firm at the center. That’s your moment to skim foam/skins and stir in the correct amount of salt based on your water measurement. If the chickpea is still firm throughout, simmer 10–15 minutes more, then taste again and salt.

Finish Cooking: Simmer about 10 more minutes after salting, then taste. Chickpeas should smash easily between your fingers while still holding their shape. The broth should taste balanced and rich.
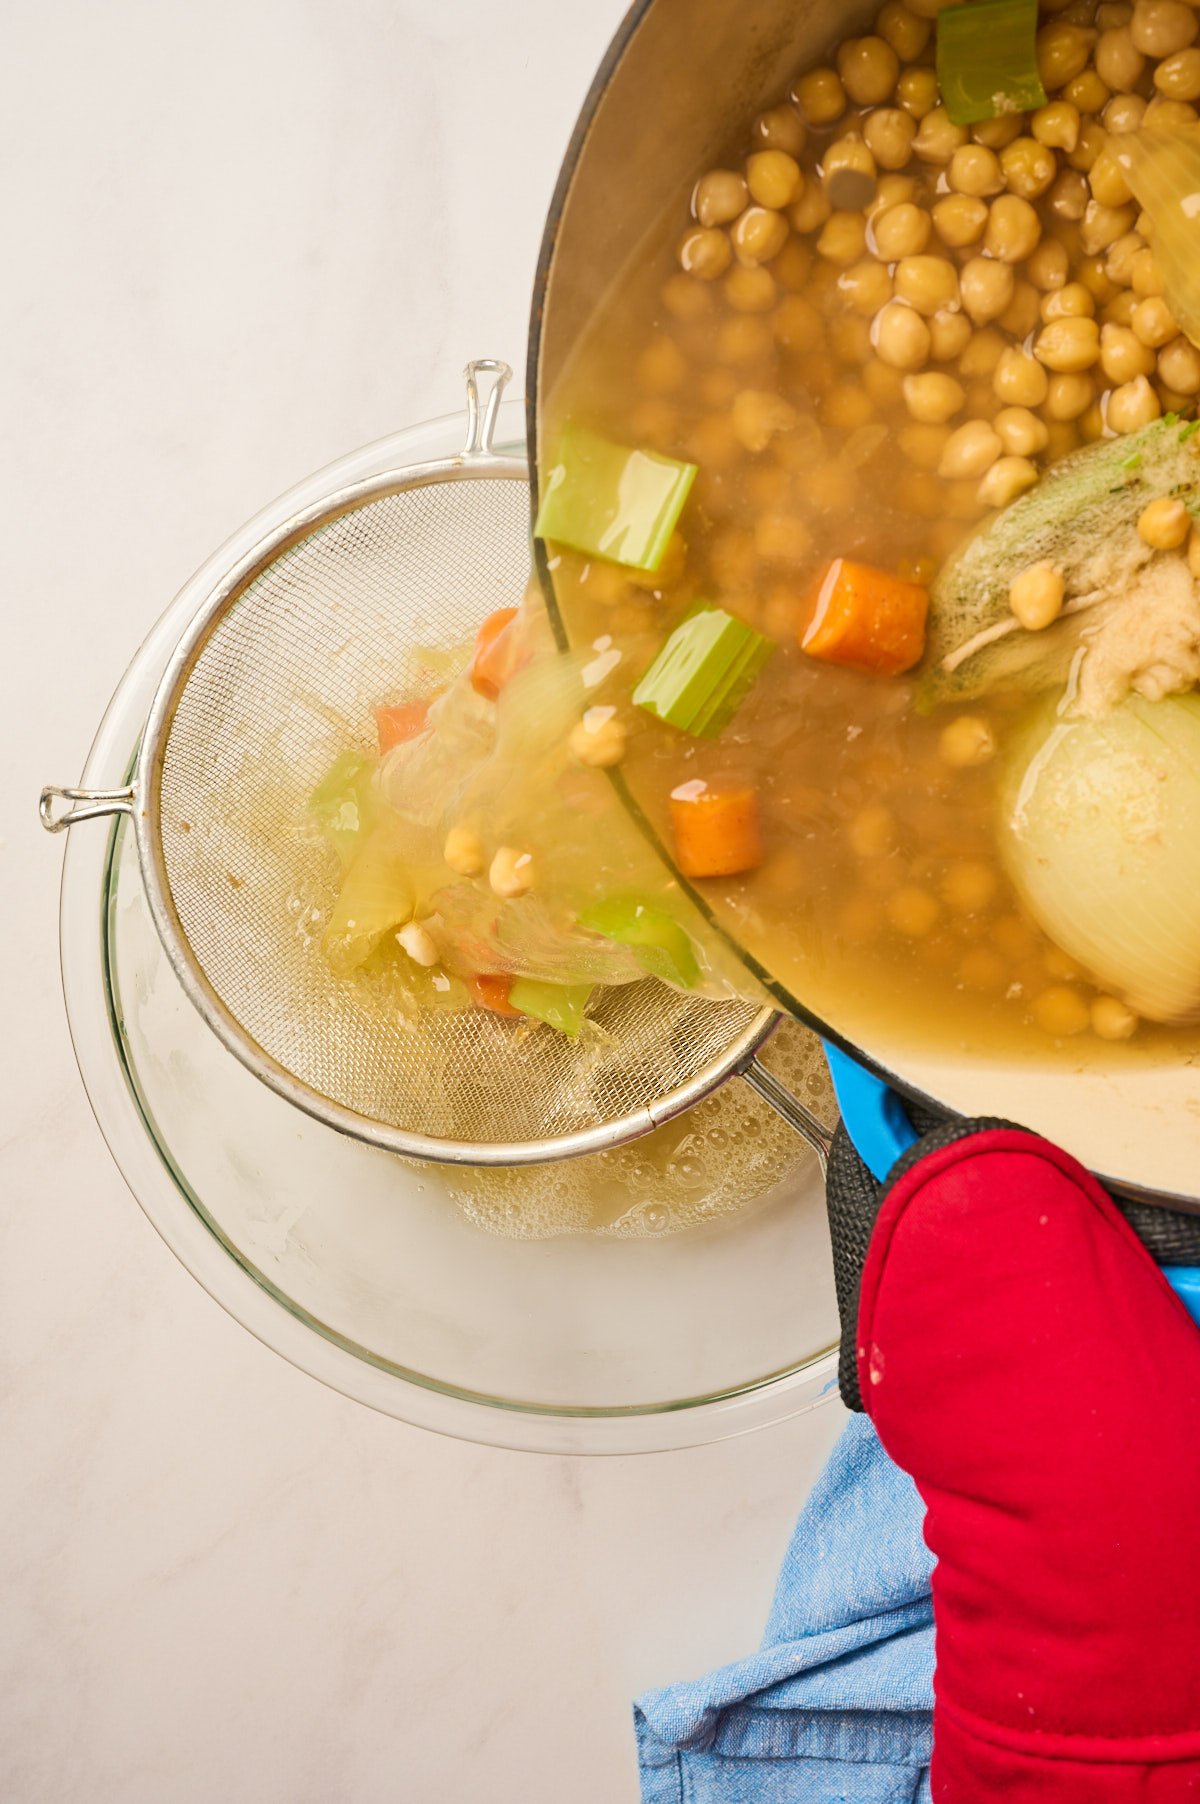
Strain & Reserve: Strain over a large bowl. Discard the herb bundle and remove the vegetables (keep or discard). Store chickpeas and broth separately for best results.
Instant Pot (Fast + Hands-Off)
While I don’t prefer this method for precision, it’s a great option when you need a batch of chickpeas with minimal effort. Keep in mind: you can’t taste or salt mid-cook, so that’s the tradeoff. However, pressure cooking intensifies flavor and yields a slightly richer, more concentrated broth.
Follow the Same Prep Steps: Add soaked chickpeas (or optionally the baking soda pre-step chickpeas) to the insert with the measured water, aromatics, and herb satchel.
Pressure Cook (High Pressure):
- 18–22 minutes for tender but intact chickpeas (best for salads or grain bowls)
- 22–26 minutes for soft, creamy chickpeas (perfect for hummus)
Natural Release: Let pressure release naturally for about 10 minutes (helps prevent splitting). Then release any remaining pressure.
Salt and Taste After Cooking: Once the pressure is fully released, stir in salt using 1 tablespoon kosher salt per 4 cups of water used. The chickpeas should smash easily but still retain their shape, and the broth should taste seasoned and aromatic. Let the chickpeas sit in the hot salted liquid for 5–10 minutes to absorb flavor.
Strain & Store: Strain out the chickpeas and aromatics, reserving the cooking liquid separately.
Slow Cooker (Richest Broth, Set-It-and-Forget-It)
This method takes the longest, but it delivers the deepest, most delicate flavor and an evenly creamy texture—perfect for bulk cooking and a hands-off approach.
Follow the Same Prep Steps: Add soaked chickpeas (or optionally the baking soda pre-step chickpeas) to the slow cooker with the measured water, aromatics, and bouquet garni.
Cook Time
- Low: 6–8 hours for the most tender, creamy chickpeas
- High: 3–4 hours for slightly firmer chickpeas with less wait
Salt and Taste in the Final Hour: About an hour before the chickpeas are done, taste the broth and chickpeas. The chickpeas should be nearly cooked through—soft but still holding their shape. Add 1 tablespoon kosher salt per 4 cups of water. This late salt addition seasons both the chickpeas and broth without interrupting the cooking process.
Drain & Reserve: Strain out the chickpeas and discard the aromatics. Store the chickpeas and broth separately in airtight containers.

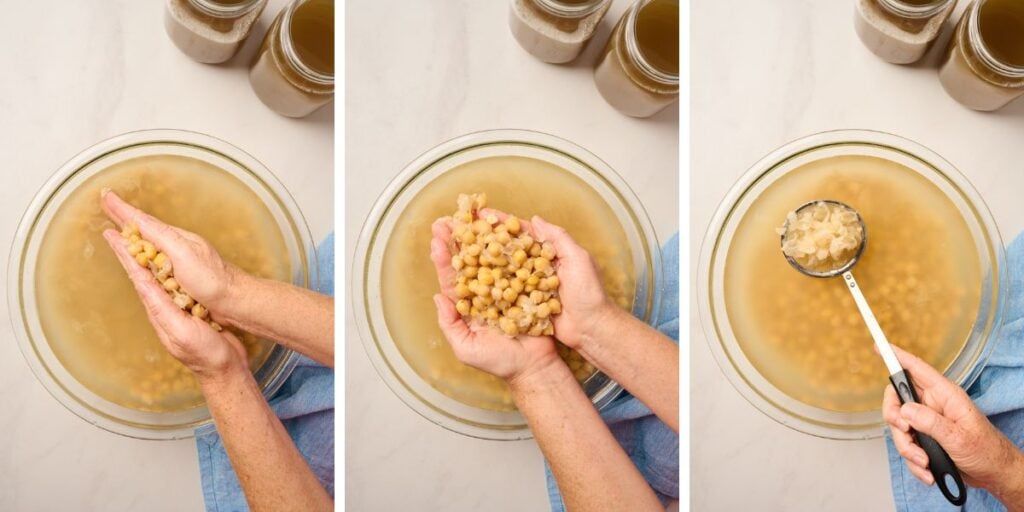
Optional Step – Remove Chickpea Skins
After testing nearly every method out there, this is the method I recommend. If you’re after ultra-smooth, creamy chickpeas (especially for hummus), removing the skins is worth the extra effort. It’s a bit labor-intensive, but it makes a noticeable difference in texture.
This builds on the earlier baking soda pre-step, which helps loosen skins before cooking. Once your chickpeas are cooked and drained, here’s how to finish the job:
How to Remove Chickpea Skins:
- Place cooked chickpeas in a large bowl of lukewarm water.
- Rub the chickpeas between your palms and fingers using a brisk back-and-forth motion. This friction helps release the skins from the peas.
- Continue this motion for several rounds. You’ll begin to see the skins separating and floating.
- Let the mixture rest undisturbed for a few minutes. The heavier chickpeas will sink to the bottom while the skins float to the surface.
- Skim the skins off with a fine-mesh strainer, slotted spoon, or your hands. Repeat this process as needed until you’ve removed most of the skins.
Chef’s Note: Don’t worry about getting every single skin. Removing most of them is enough to make hummus noticeably smoother. Once you taste the velvety results in homemade hummus, you’ll understand why pros do it.
Flavor Variations for Cooking Chickpeas
Once you’ve learned how to cook chickpeas from scratch, you can build bold flavor right into the broth. Here are a few chef-tested variations to try:
Mexican-Inspired Chickpeas: Add cilantro stems, dried or fresh chilies (like guajillo or jalapeño), tomato, and lime peel to your cooking water. Best for: tacos, tostadas, grain bowls, or enchilada-style dishes.
Asian-Inspired Chickpeas: Infuse the broth with sliced ginger, scallion whites, a splash of Shaoxing wine or rice vinegar (added after cooking), and a dash of tamari or soy sauce. Best for: rice bowls, stir-fries, or noodle salads.
Indian-Spiced Chickpeas: Use whole cumin seeds, turmeric, fresh ginger, green chilies, cilantro stems, and chopped tomato. These warming spices bring out the best in chickpeas. Best for: chana-style curries, dals, stews, or grain-based salads.
Pro Tip: Avoid adding acidic ingredients like vinegar or citrus juice early in the cooking process. Acids can toughen chickpeas and increase cook time—add them only after the beans are fully tender.
Recipes to Use Your Cooked Chickpeas
Cooked chickpeas are one of the most versatile ingredients to keep on hand, as they are protein-packed, filling, and ready to enhance just about any dish. Here are some of my favorite ways to use them:
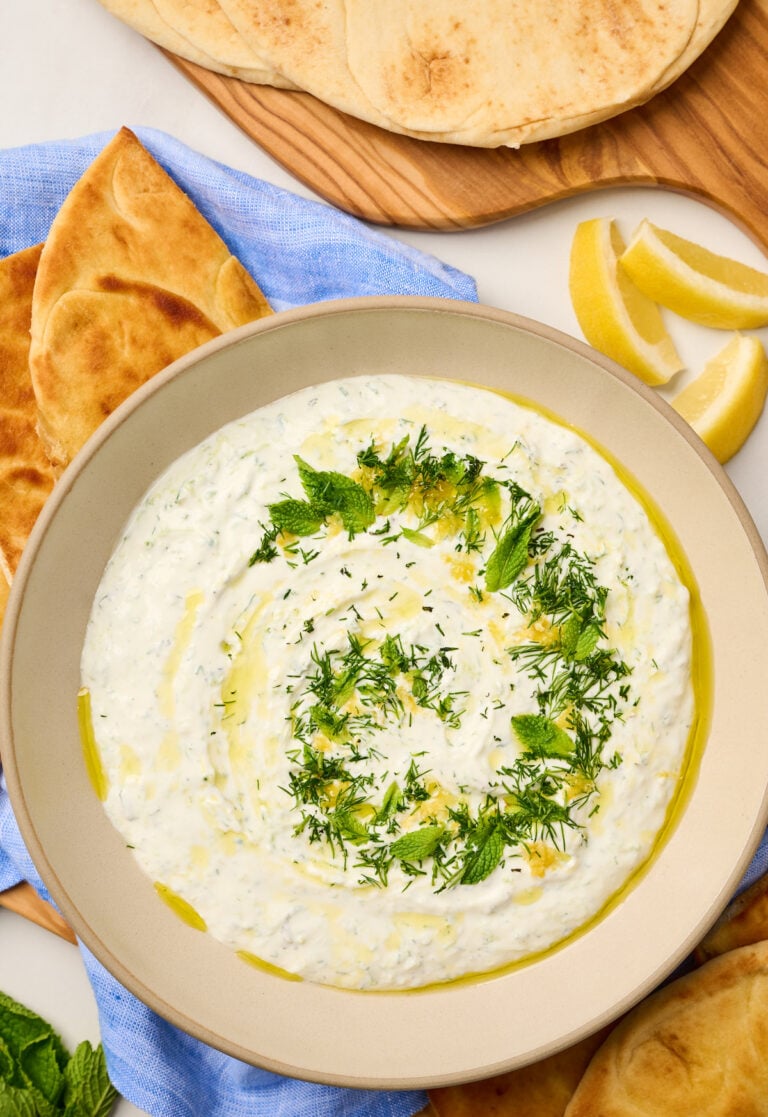
Make a Dip or Purée: Blend your chickpeas into a creamy, fluffy base for this authentic, homemade hummus, which is perfect as a snack, appetizer, or addition to a mezze platter.
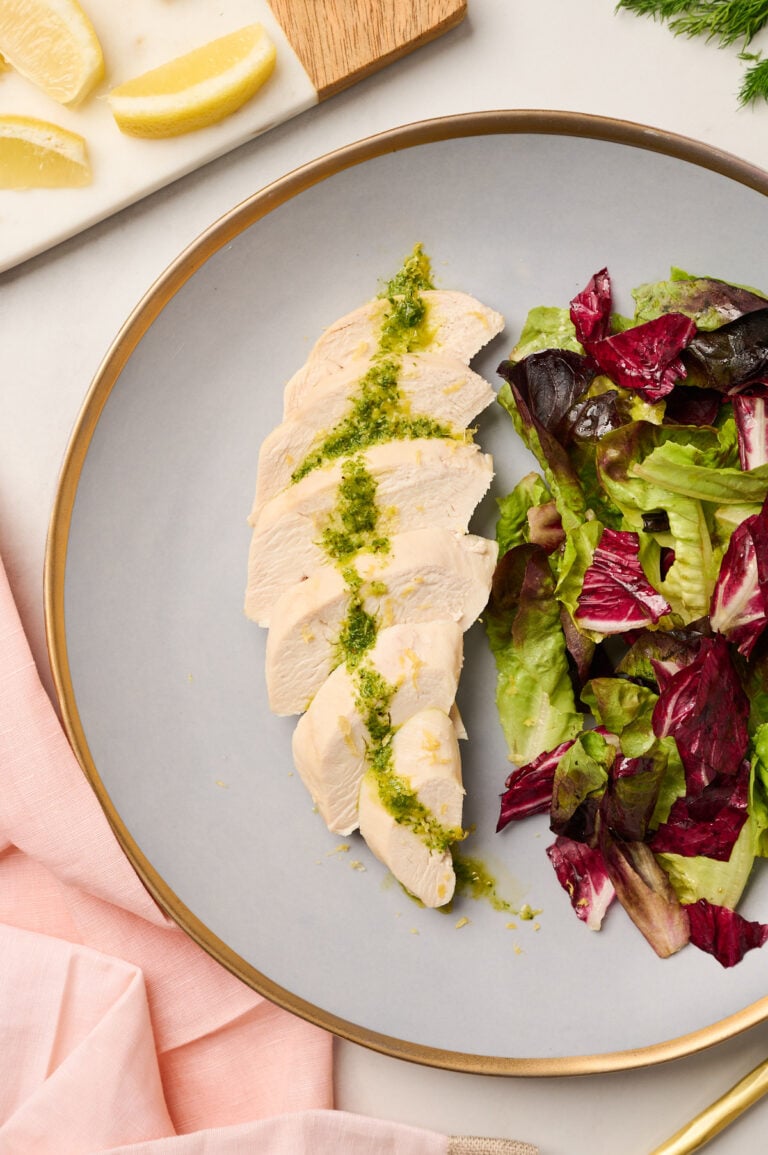
Add protein and sustenance to salads by tossing in a scoop of chickpeas. Try this in vibrant salads like cucumber tomato salad, summer corn salad, tabbouleh salad, burrata salad, or the sweet and creamy persimmon salad, They add texture, fiber, and a satisfying bite.
Stir into Grain, Rice & Pasta Bowls: Chickpeas make a hearty addition to bowls built on farro, bulgur wheat, pearl couscous, or steamed rice. Top with roasted vegetables, air fryer broccoli, sautéed kale, or tomato confit for a balanced and flavorful meal.
Boost the Protein in Soups: Add cooked chickpeas to cozy dishes like this nourishing chicken tortilla soup, kabocha squash soup or zesty chicken tortilla soup. They absorb flavor beautifully, making the soup more satisfying and satiating.
How to Store and Freeze Cooked Chickpeas
Whether you’re meal prepping for the week or saving leftovers for later, proper storage helps preserve both flavor and texture.
Refrigerator (Best for Short-Term Storage)
Store chickpeas in an airtight container with a splash of their cooking liquid for 5–7 days. The liquid keeps them moist, tender, and flavorful. Add directly to soups, stews, or salads.
Can You Freeze Cooked Chickpeas?
Yes. Let chickpeas cool completely, then portion them (with or without cooking liquid) into freezer-safe containers, zip-top bags, or silicone trays. Freeze for up to 3 months.
Tips for Thawing and Reheating
- Thaw overnight in the fridge, or add frozen chickpeas directly to hot dishes like soups and stews.
- For salads or grain bowls, gently reheat in a sauté pan with a splash of cooking liquid or water to refresh moisture.
- Pro Tip: Freeze chickpeas in 1- to 2-cup portions for easy grab-and-go servings—ideal for hummus, veggie bowls, or curries without having to defrost a whole batch.
Is the Cooking Liquid Aquafaba?
Yes—when you cook chickpeas from scratch, the cooking liquid is also called aquafaba (“bean water”). It contains starches and proteins released from the chickpeas, which is why it can foam and whip.
Why Homemade Aquafaba Is Different Than Canned
Canned chickpeas sit in a small amount of liquid for a long time, so the aquafaba is usually more concentrated and reliably thick. Homemade cooking liquid is often thinner because we typically cook dried chickpeas with more water—so it needs to be reduced to behave the same way.
How to Make Homemade Aquafaba Work for Whipping (Meringues, Mayo, Mousses)
- Reduce it: After straining out the chickpeas, simmer the liquid until it’s noticeably thicker and slightly syrupy—similar to canned aquafaba. Depending on your water amount, this may mean reducing by about 50–75%.
- For desserts: Make a plain batch (skip vegetables/herbs and keep salt minimal or omit), since savory aromatics can carry into sweet recipes.
- Chill it: Aquafaba thickens as it cools and whips best when fully cold.
Pro Tip (Soaking Water vs Cooking Liquid)
If you soak chickpeas overnight, discard the soaking water and cook in fresh water. The soaking water contains oligosaccharides (the sugars associated with gas and bloating), while the cooking liquid is what you want to save for broth—or for aquafaba.
More Legume + Bean Recipes to Try
- Authentic Homemade Hummus
- Chickpea and Spinach Stew
- Crispy Roasted Chickpeas
- Chickpea Shawarma Wraps
Pro Tip: Cooked chickpeas can easily be substituted into many dishes that call for white beans, lentils, or even meat, making them an ideal pantry staple for plant-forward meals.
Recipe Card
How to Cook Chickpeas Recipe (Stovetop, Instant Pot, or Slow Cooker)
Equipment
Ingredients
- 1 lb dried chickpeas (garbanzo beans)
- 2 tbsp kosher salt
- 1 tsp baking soda, (optional)
- 1 carrot, chopped
- 1 stalk celery, chopped
- 1/2 yellow or white onion, halved
- 3 cloves garlic, smashed
- 2 bay leaves
- 3-4 sprigs thyme
- 6-8 parsley stems
- 1/2 tsp whole black peppercorns
Instructions
Rinse & Soak (All Methods):
Note: This recipe is written for soaked chickpeas for all three cooking methods.
- Rinse and sort 1 lb of dried chickpeas.
- Soak overnight in water (2–3 inches above beans), or use a quick/instant soak method.
- Drain and rinse well before cooking.
- Optional (for creamier chickpeas / easier skins): Warm the soaked chickpeas with 1 tsp baking soda for 2–3 minutes, stirring, before adding water and aromatics.
Stovetop Method:
- Add soaked and rinsed chickpeas to a large pot and cover with 8 cups fresh cold water.
- Add carrot, celery, onion, and garlic. Wrap bay leaves, thyme, parsley stems, and peppercorns in cheesecloth and tie into a satchel; add to the pot.
- Bring to a boil, then immediately reduce to a gentle simmer. Cover with a lid.
- Simmer for 30 minutes, then taste a chickpea. It should be slightly firm outside but tender inside. Skim any foam/skins.
- If the chickpea is tender inside but still slightly firm at the center, stir in 2 tbsp kosher salt. If it’s still firm throughout, simmer 10–15 minutes more, then salt.
- After salting, simmer for about 10 more minutes, until chickpeas are tender and creamy but hold their shape.
- Strain chickpeas over a bowl to keep the broth. Discard the herb satchel and vegetables (or reserve if desired).
Instant Pot Method:
- Add soaked and rinsed chickpeas to the Instant Pot with 8 cups fresh water, carrot, celery, onion, garlic, and the herb satchel.
- Pressure cook on Manual | High for:*18–22 minutes for tender chickpeas*22–26 minutes for soft, creamy chickpeas (ideal for hummus)
- Let pressure release naturally for 10–15 minutes, then release any remaining pressure.
- Stir in 2 tbsp kosher salt, then let chickpeas sit 5–10 minutes in the hot salted liquid to absorb flavor.
- Strain chickpeas over a large bowl to keep the broth. Discard the satchel and vegetables (or reserve).
Slow Cooker Method:
- Add soaked and rinsed chickpeas to the slow cooker with 8 cups fresh water, carrot, celery, onion, garlic, and the herb satchel.
- Cook time:*Low for 6–8 hours for soft, creamy chickpeas and deep flavor*High for 3–4 hours for a slightly firmer texture
- During the last hour of cooking, skim off any impurities, and stir in 2 tablespoons of kosher salt.
- Strain chickpeas over a large bowl to keep the broth. Discard the satchel and vegetables (or reserve).
Notes
- Yield: 1 lb dried chickpeas = ~6 cups cooked
- Storage: Refrigerate chickpeas with a splash of cooking liquid 5–7 days
- Freezing: Freeze up to 3 months (with or without broth)
- Store separately: For best texture, store chickpeas and broth in separate containers.
- Salt timing: Skip salting the soak. Salt the cooking water once chickpeas are about ¾ cooked for best flavor/texture.
- For creamy hummus: Remove skins if desired; blend soft chickpeas with some cooking liquid and ice cubes.
- Optional for hummus: Remove chickpea skins for a smoother texture (see post for the full method).
Nutrition
FAQs
Here are the most common questions (and chef-tested answers) to help you troubleshoot texture, timing, and flavor—so your chickpeas turn out tender and creamy every time.
It depends on the method and the age of your beans, but as a general guide: stovetop 60–90 minutes, Instant Pot 18–26 minutes at high pressure (plus release time), and slow cooker 3–4 hours on High or 6–8 hours on Low.
They’re done when a chickpea smashes easily between your fingers (or against the side of the pot) but still holds its shape. For hummus, cook them a little longer so they’re very soft and creamy.
Usually it comes down to old beans, acid added too early, or too low of a simmer. Older chickpeas take longer; keep a gentle simmer; and add lemon/vinegar/tomatoes after chickpeas are tender.
Usually an aggressive boil or rapid temperature swings. Keep a gentle simmer and avoid big heat changes.
Some methods allow it, but this recipe is written for soaked chickpeas for the best texture.
Add salt when chickpeas are about ¾ cooked—tender inside but slightly firm at the center.
Optional—use a small amount before cooking (warming soaked chickpeas briefly) to help loosen skins for extra-creamy results.