This Authentic Homemade Hummus Recipe is a chef-tested Mediterranean dip made with chickpeas, tahini, garlic, lemon, and olive oil. Using warm chickpeas and ice cubes for a whipped, airy finish, it turns out incredibly creamy, light, and full of bright, balanced flavor in just 15 minutes—better than anything store-bought.
What makes this hummus special is its airy texture and bold, balanced flavor—exactly the kind of homemade dip that makes store-bought hummus hard to go back to. My family absolutely swoons over this recipe because it has a smooth, luxurious texture without feeling heavy.
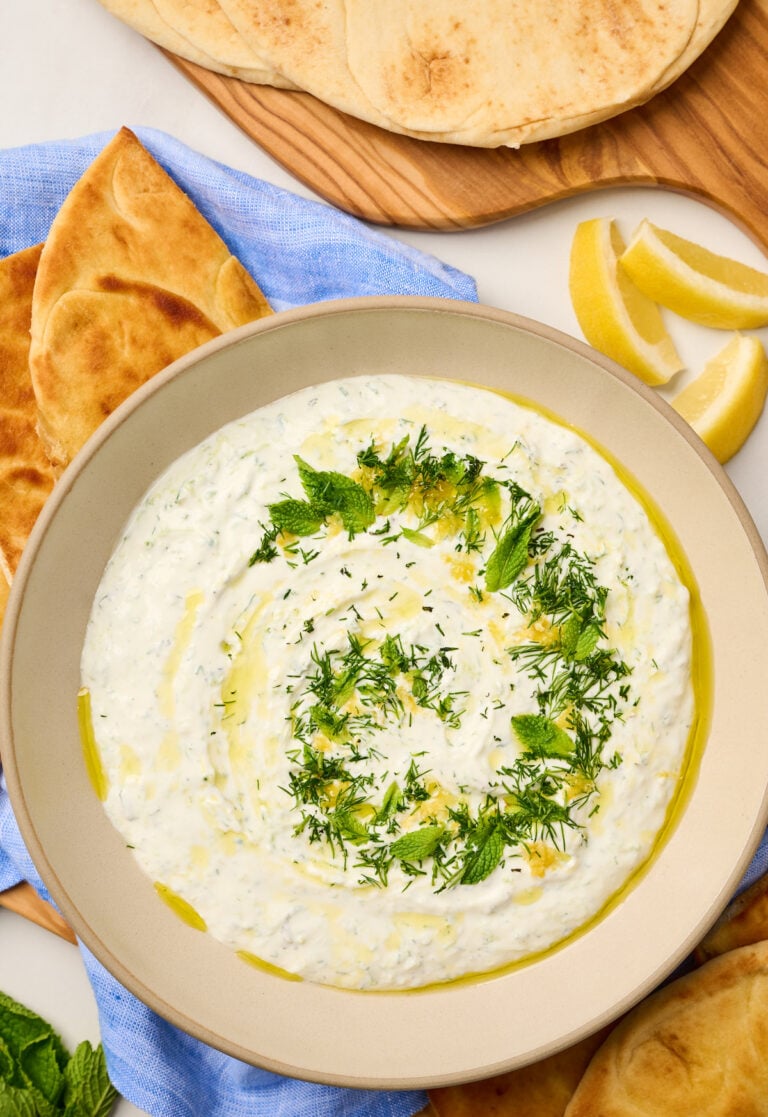
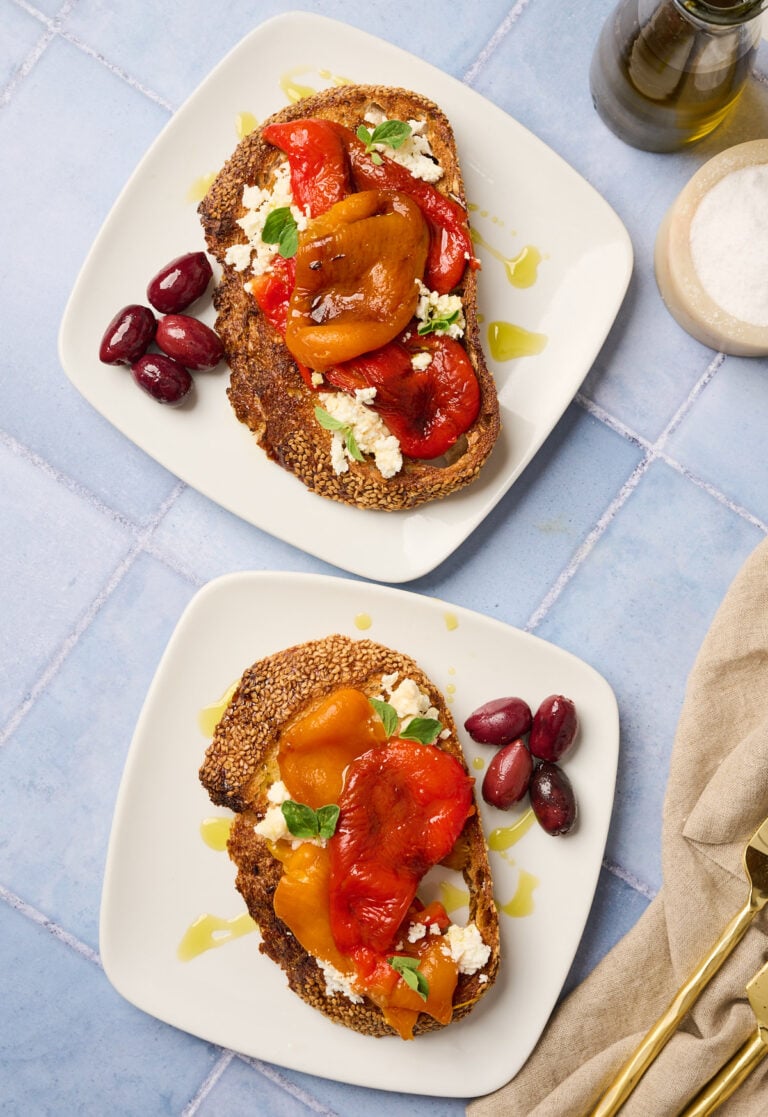
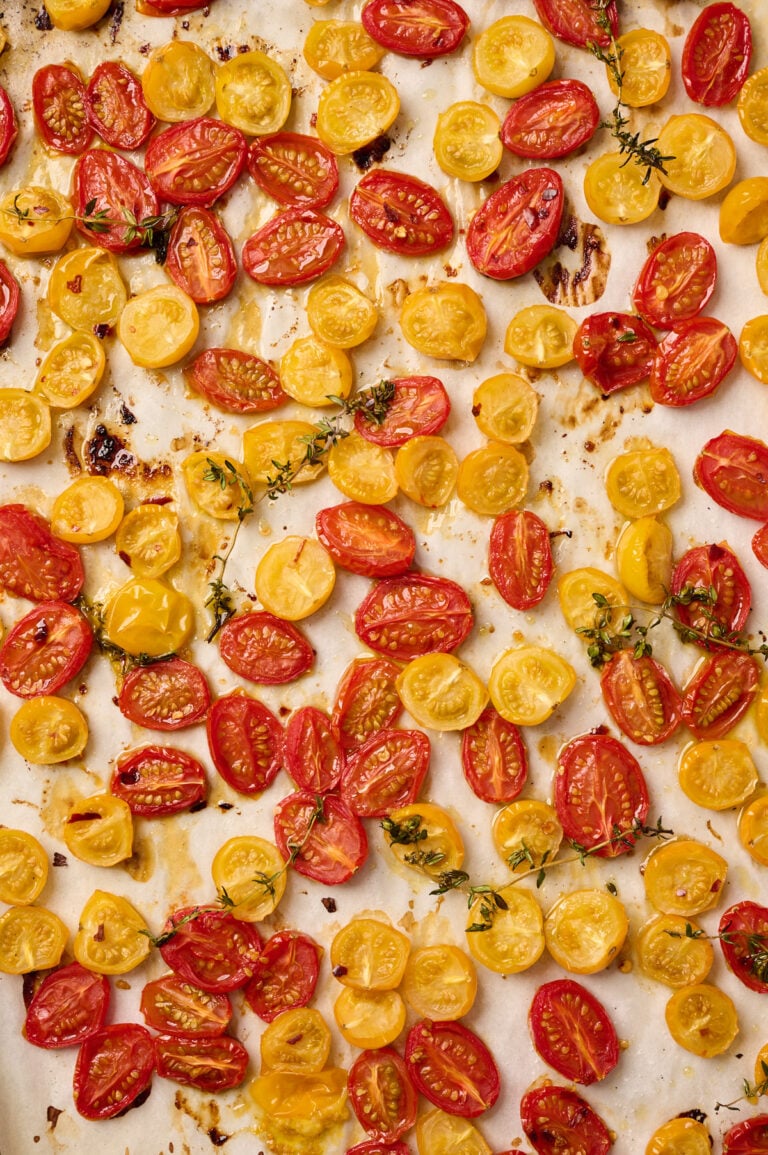
As a professional chef, I’ve tested every technique to create the smoothest, most luxurious hummus possible, from softening and peeling the chickpeas to blending them warm and finishing with ice for a whipped, airy texture. The result is hummus with a more refined, restaurant-quality finish.Pair it with warm pita or crisp veggies, spoon it onto grain bowls and salads, or build a Mediterranean mezze platter with tzatziki, tirokafteri, roasted peppers, and tabbouleh. However you serve it, this homemade version always delivers.
Table of Contents
- Why This Homemade Hummus Is Next-Level
- Homemade Hummus Ingredients
- How to Make Homemade Hummus
- Recipe Card
- How to Store Homemade Hummus
- Homemade Hummus FAQs
- What to Serve with Homemade Hummus
- Homemade Hummus Variations
Why This Homemade Hummus is Next-Level
What sets this homemade hummus apart is the technique, not just the ingredients. Through culinary producing and food styling for television, I’ve tested every method for creating an exceptionally smooth, airy texture, and this recipe brings the most effective ones together:
Remove the chickpea skins (optional, but worth it): For the smoothest hummus, removing most of the skins makes a noticeable difference. Below, I outline the method that works best for both canned chickpeas and chickpeas cooked from dried. Check out my full How to Cook Chickpeas guide.
Warm-to-cold blending: Starting with warm chickpeas creates a silkier base, while blending in ice cubes at the end helps whip air into the tahini and strengthen the emulsion. The result is hummus that feels light, luscious, and restaurant-quality.
Fat structure + aeration = fluff: This science-backed technique works with tahini’s natural fat to trap air and emulsify the hummus quickly and evenly, creating its signature whipped texture.
Once you learn these chef-tested techniques, store-bought hummus simply won’t compare. Below, you’ll find the exact ingredients and method details that make this version so smooth, fluffy, and full of flavor.
What Does Baking Soda Do to Chickpeas?
Baking soda helps soften the chickpea skins by breaking down their pectin, which makes the skins easier to loosen and remove. It also helps the chickpeas soften a bit more on the outside, which contributes to a smoother final texture. Used correctly, it is one of the simplest ways to create hummus that feels smoother, creamier, and more refined. My full technique is explained below.
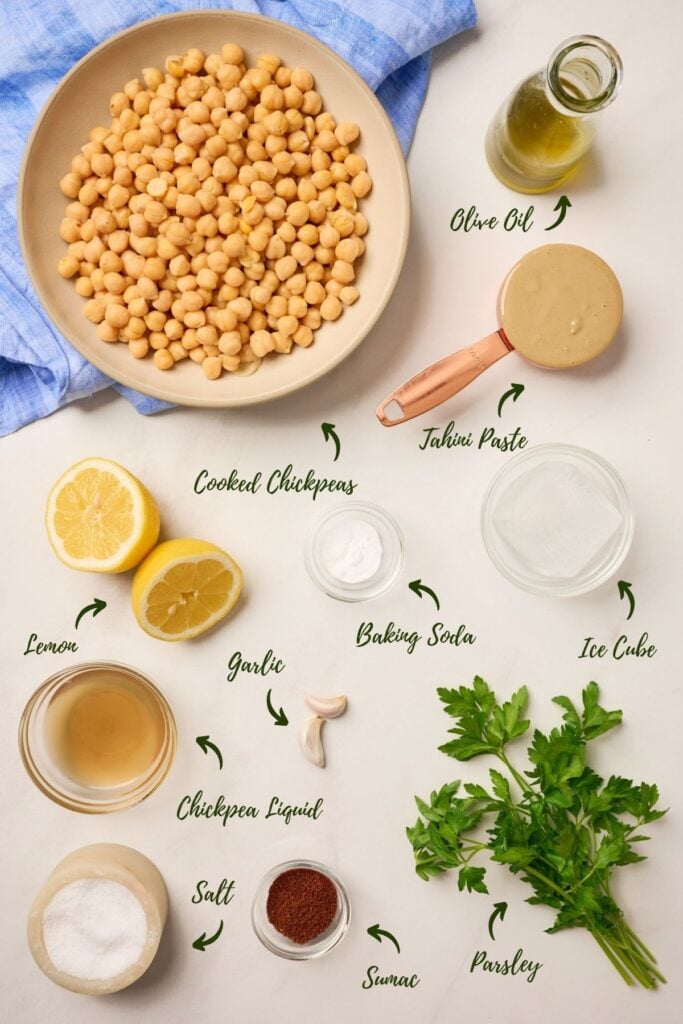
Homemade Hummus Ingredients
These core ingredients create homemade hummus with bold flavor and exceptionally smooth texture.
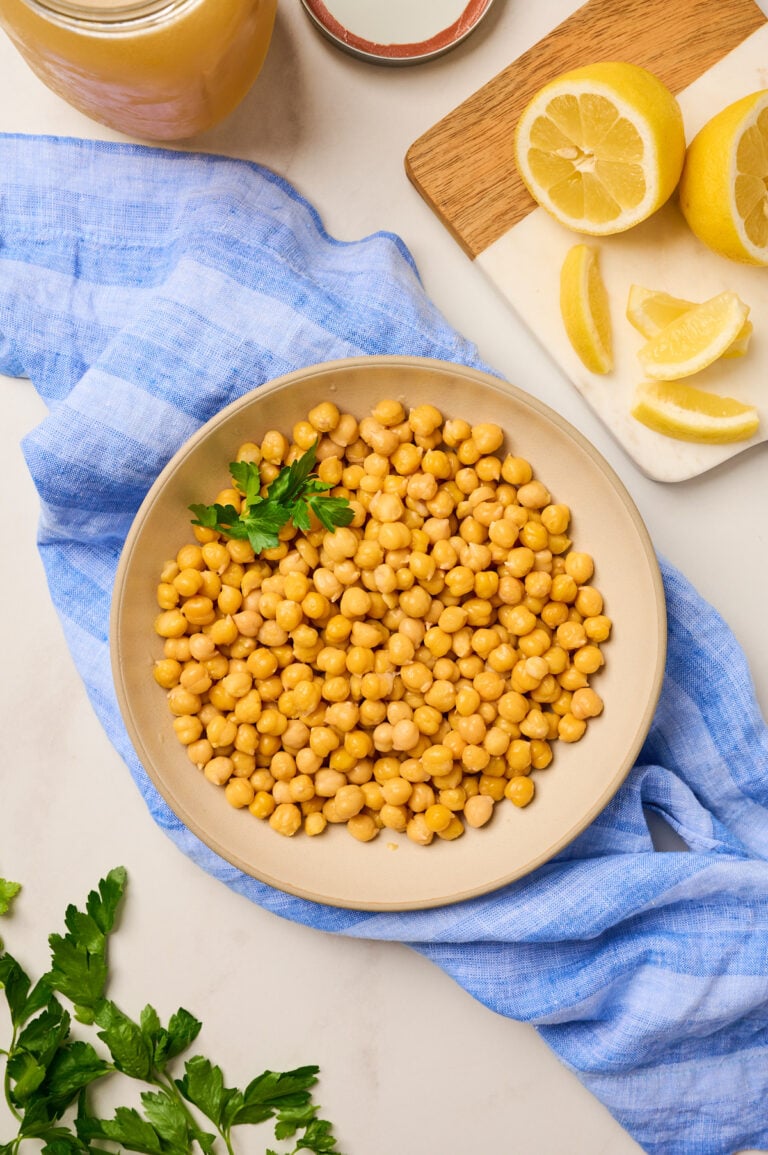
Chickpeas: Chickpeas are the heart of hummus, so their texture matters. Canned chickpeas are a great shortcut and still make delicious hummus, especially when softened and peeled before blending. For the creamiest texture and deepest flavor, chickpeas cooked from dried are the best option. My full guide to cooking chickpeas walks you through the process step by step.
Baking Soda (Optional): For ultra-smooth hummus, baking soda helps loosen chickpea skins, making them easier to remove. I include this method for both canned and cooked-from-scratch chickpeas.
Tahini: Tahini adds richness, creates the base of the emulsion, and works with the ice cube technique to give the hummus its signature whipped consistency. Choose one that is smooth, pourable, and pleasantly nutty rather than thick, dry, or bitter. My favorite brand is Seed + Mill, which I discovered while living in New York City and working at Food Network.
Garlic: Raw garlic adds brightness and bite. For a mellower flavor, soak it in lemon juice for 10 minutes before blending. The acidity softens its sharpness, creating a more balanced, rounded flavor. For an even subtler result, strain out the garlic and use only the infused lemon juice.
Lemon Juice: Lemon adds brightness, balance, and lift. It cuts through the richness of the tahini, enhances the garlic, and makes the other flavors pop. Always use freshly squeezed lemon juice for the cleanest flavor.
KosherSalt: Salt brings out the chickpeas’ natural sweetness and ties everything together. Start with the listed amount, then adjust to taste after blending.
Ice Cubes: Ice cubes are a key technique that makes this hummus special. The cold helps the tahini emulsify while trapping air in the mixture, creating that light, whipped, restaurant-quality texture.
Canned vs. Dried Chickpeas for Hummus
If you have the time, chickpeas cooked from dried will give you the best flavor and the creamiest texture. They tend to be softer, fresher, and easier to blend into a silky purée. That said, canned chickpeas are absolutely a great shortcut and still make excellent hummus, especially if you warm them with a little baking soda and remove most of the skins before blending. For everyday ease, canned works beautifully. For the most luxurious texture, dried is the better choice.
How to Make Homemade Hummus
Here’s how to make ultra-creamy, authentic homemade hummus with chef-tested steps, sensory cues, and options for both canned and cooked-from-scratch chickpeas.
Prep and Peel the Chickpeas
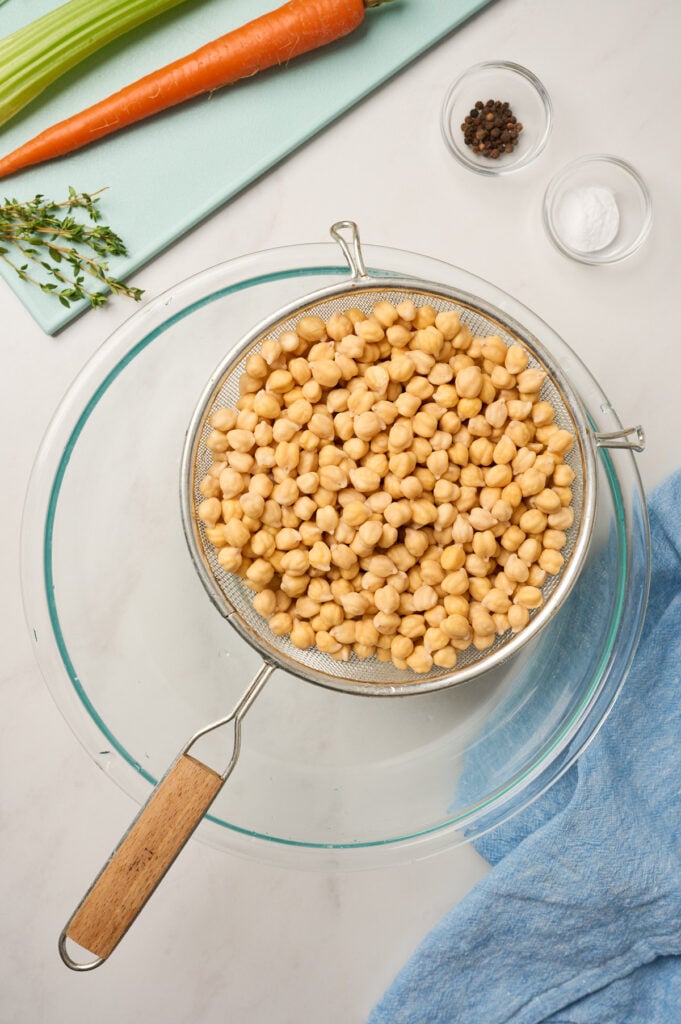
Drain and prep the chickpeas: If using canned chickpeas, reserve ¼ cup of the can liquid (aquafaba), then drain and rinse them well. If using cooked-from-scratch chickpeas, reserve ¼ cup of the cooking liquid instead. This starchy liquid helps loosen the hummus, adds body, and creates a smoother, more cohesive purée. If you started with dried chickpeas, soaking alone is not enough—they still need to be fully cooked and tender before blending.
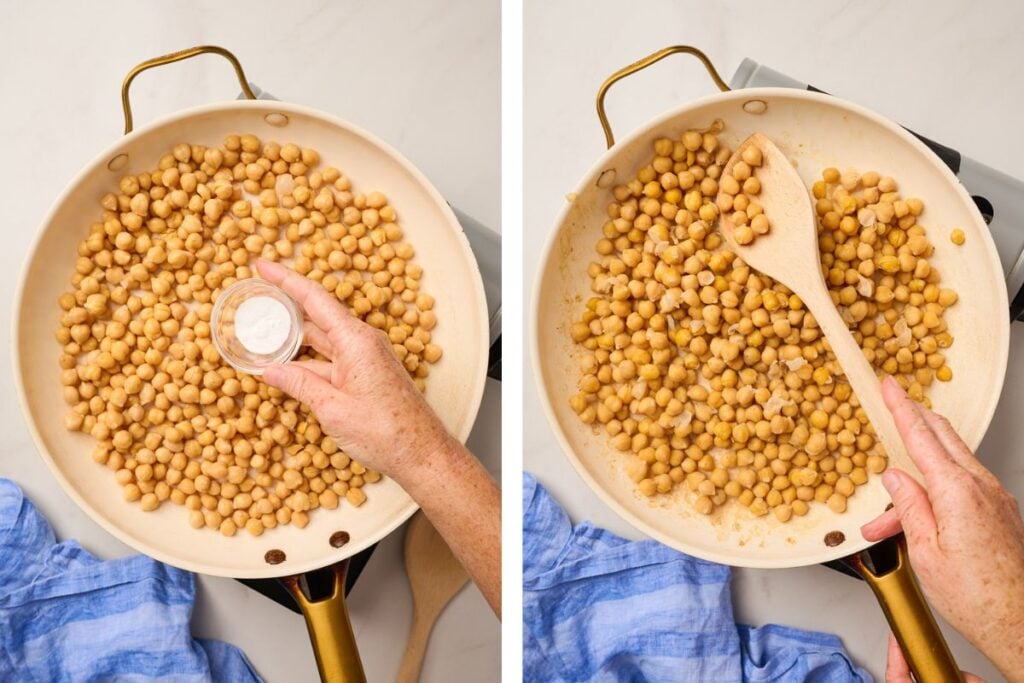
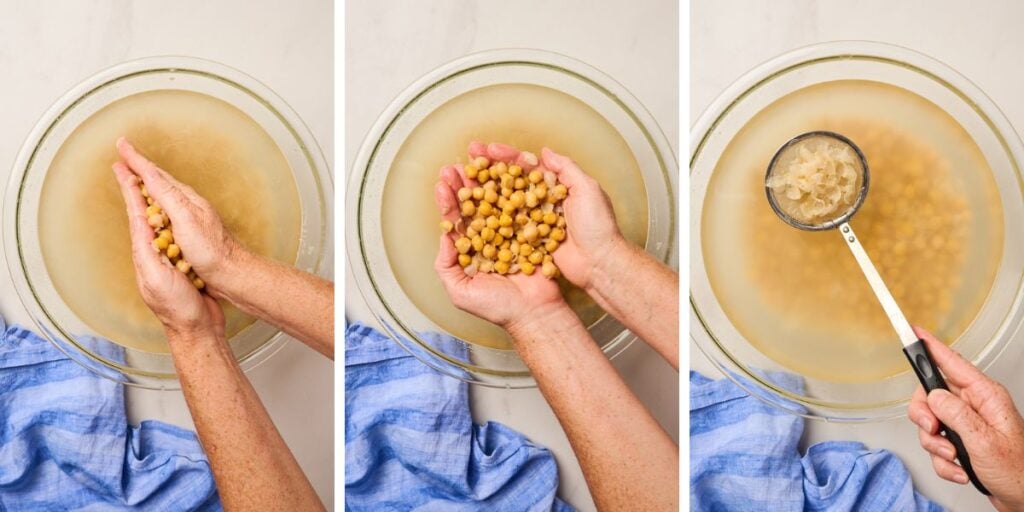
Remove the chickpea skins (optional, but worth it): For the smoothest hummus, removing most of the skins makes a noticeable difference. I’ve tested several methods, and this is the one that works best. Toss the drained chickpeas with 1 teaspoon of baking soda, then warm them for 2 to 3 minutes in a pan or microwave, stirring a few times so the baking soda coats the chickpeas evenly and helps loosen the skins.
Transfer the warm chickpeas to a large bowl of lukewarm water and rub them between your palms to create friction, which helps release the skins. Repeat this process for 3 to 4 rounds. Then let the chickpeas sit briefly—the skins will float while the beans sink. Skim off and discard the skins.
Chef’s Note: You don’t need to remove every skin—just most of them. It’s about creating a smoother texture, not perfection.
Optional: Set aside ¼ cup of whole chickpeas for garnish.
Blend Until Smooth
Use a high-powered blender if possible: A high-powered blender, rather than a food processor, can produce a smoother purée thanks to its stronger blade motion and vortex action. If ultra-creamy texture is your goal, a blender is your best bet.
Start with warm chickpeas: Whether freshly cooked or gently reheated from canned, warm chickpeas break down more easily and create a silkier base. Warm starches are softer and blend into a fluffier, almost milkshake-like paste—one of the tricks professional kitchens use to achieve that restaurant-quality texture.
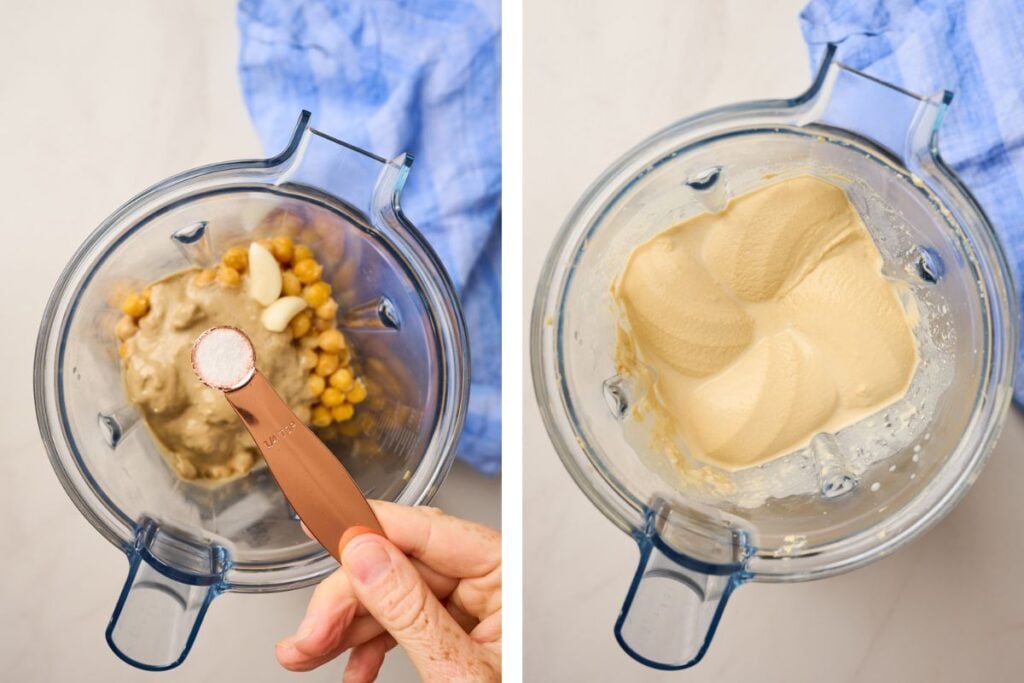
Blend until completely smooth: Add 1 ½ cups warm chickpeas to a food processor or blender with the tahini, garlic, lemon juice, reserved liquid, and salt. Blend until completely smooth, then keep going, scraping down the sides as needed. That extra 30 to 60 seconds makes all the difference in creating an ultra-creamy base before introducing the ice.
Why warm first? Cold chickpeas and tahini don’t emulsify as easily because their fats are more rigid, which can lead to a grainier, less cohesive texture.
Add Ice, Adjust, and Serve
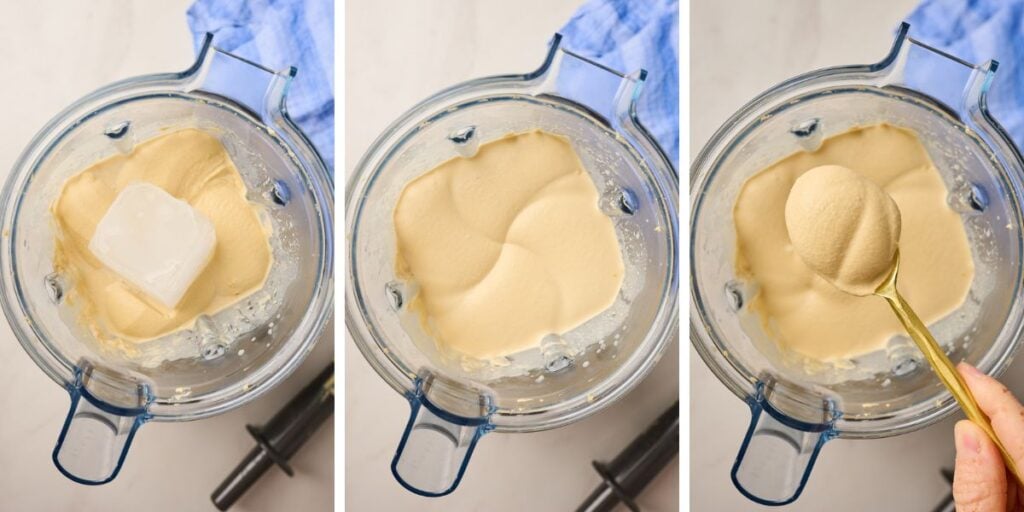
Add ice cubes for whipped texture: With the motor running, drop in 2 to 3 ice cubes and blend until fully melted and incorporated. Adding ice cubes does more than chill the hummus—it helps aerate the mixture, emulsify the tahini, and create that signature light, fluffy texture.
Use the cold to trap air: As the blender runs, its circular motion whips air into the hummus. When the tahini is cold, its fats firm up slightly, creating a more stable structure that can trap those air bubbles and produce hummus that’s smoother, more aerated, and more refined.
Check the texture and season to taste: Once your hummus is fully blended, taste and adjust as needed. If the hummus feels too thick, blend in 1 tablespoon of cold water or reserved cooking liquid at a time until it reaches your ideal consistency. If it needs more acidity or salt, add a splash of lemon juice or a pinch more kosher salt.
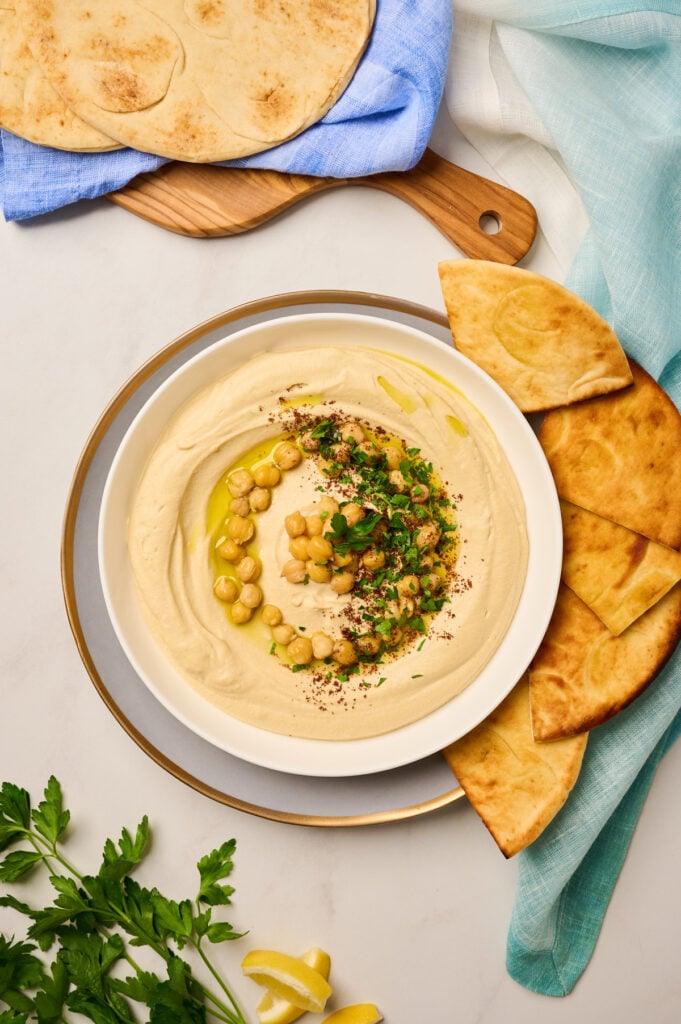
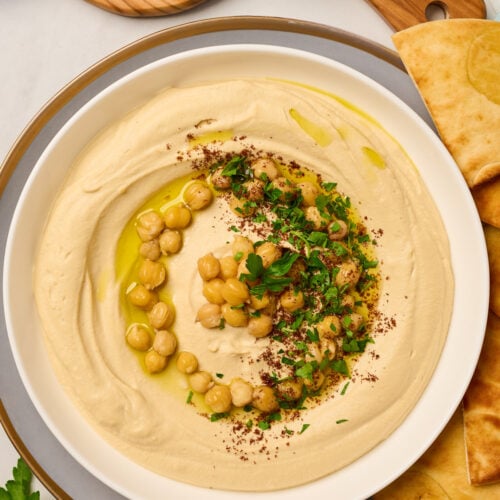
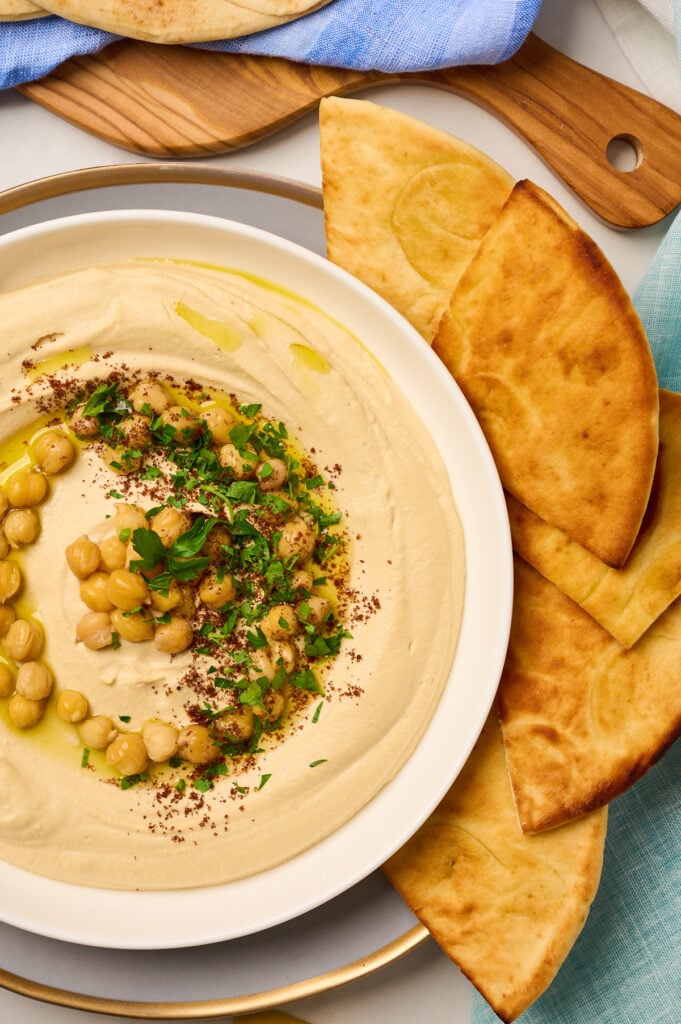
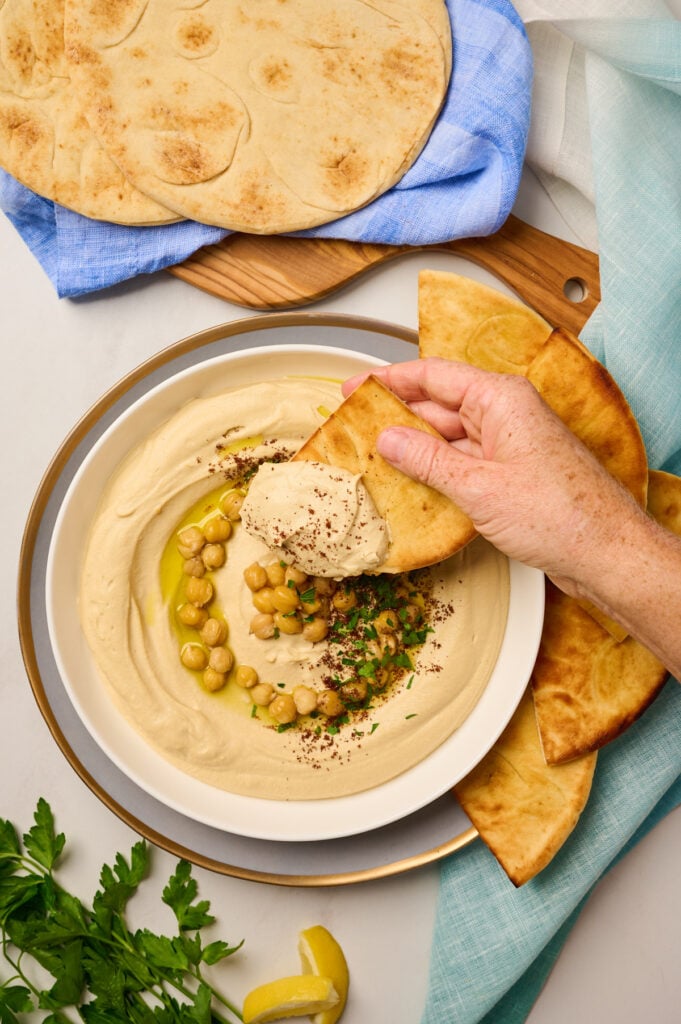
Garnish and serve: Transfer the hummus to a serving bowl. Drizzle with olive oil and top with the reserved chickpeas, a sprinkle of sumac or Aleppo pepper, and fresh parsley. Serve with warm pita, pita chips, or raw vegetables.
Recipe Card
Authentic Homemade Hummus Recipe
Equipment
- Optional Large Sauté Pan
- Optional Wooden Spoon
- Optional Large Bowl
Ingredients
- 1 1/2 cups cooked chickpeas (or 1 (16-ounce) can chickpeas)
- 1/4-1/2 cup aquafaba or chickpea cooking liquid
- 1 tsp baking soda, optional, for skin removal
- 1/2 cup tahini, smooth and pourable
- 1-2 cloves garlic
- 3 tbsp fresh lemon juice
- 1/4 tsp kosher salt, plus more to taste
- 2 small ice cubes, or 1 large
- Olive oil for drizzling
- Optional Garnishes: Reserved whole chickpeas, sumac or Aleppo Pepper, chopped parsley, tahini sauce.
Instructions
- Prep the chickpeas: If using canned chickpeas, first reserve ¼ to ½ cup of the can liquid (aquafaba), then drain and rinse the chickpeas. If using freshly cooked chickpeas, reserve ¼ to ½ cup of the cooking liquid before draining.Optional: Remove the skins for extra-creamy hummus. Toss the chickpeas with 1 teaspoon of baking soda and stir well to coat evenly. Warm for 2 to 3 minutes in a skillet or microwave. Transfer to a bowl of lukewarm water and rub them between your hands to loosen the skins. Repeat 4 to 5 times, then skim off the floating skins, rinse, and drain. You do not need to remove every skin. If desired, set aside ¼ cup whole chickpeas for garnish.
- Blend the hummus base: A high-powered blender is preferred here, as its stronger blade motion and vortex action create a silkier purée than most food processors.For the smoothest texture, use warm chickpeas for the first blend. Add the chickpeas, tahini, lemon juice, garlic, salt, and ¼ cup reserved liquid to a high-powered blender or food processor. Blend until smooth and creamy, scraping down the sides as needed. Continue blending for an extra 30 to 60 seconds for the best texture.
- Add ice cubes for a whipped texture: With the motor running, add 2 to 3 ice cubes and blend until fully melted and incorporated. Adding ice helps aerate the hummus and emulsify the tahini, creating a lighter, fluffier, restaurant-style texture.
- Taste and adjust: Taste and adjust as needed. For a thinner hummus, blend in more cold water or a little more cooking liquid. If it feels too thin, blend in another spoonful of tahini. Add more salt or lemon juice to taste.
- Garnish and serve: Transfer the hummus to a serving bowl. Use the back of a spoon to create swoops so the olive oil pools. Top with reserved chickpeas, chopped parsley, sumac, Aleppo pepper, or your favorite garnishes. Serve slightly warm or at room temperature with pita, raw vegetables, or as part of a mezze platter.
Notes
- Fresh is best: Chickpeas cooked from scratch usually give you the creamiest texture and best flavor. Here’s how I cook chickpeas from scratch.
- Tahini matters: Use a smooth, pourable tahini for the silkiest hummus.
- Garlic tip: For a milder garlic flavor, soak the garlic in the lemon juice for 10 minutes before blending.
- Serving tip: This hummus is especially silky and flavorful served slightly warm or at cool room temperature.
- Garnish creatively: Try za’atar, toasted seeds, chili oil, or tapenade for a different finish.
Nutrition
How to Store Homemade Hummus
This homemade hummus stores beautifully, which makes it perfect for meal prep, snacking, or make-ahead entertaining.
Refrigerator: Store hummus in an airtight container in the fridge for 5 to 7 days. Before serving, give it a good stir and, if needed, loosen it with a spoonful of cold water or a drizzle of olive oil to refresh the texture and flavor.
Freezer: Hummus can also be frozen, though the texture may change slightly once thawed. Let it thaw overnight in the refrigerator, then stir well or re-blend until smooth and creamy again.
Pro Tip: Freeze hummus in small portions using silicone ice cube trays or mini containers so you can thaw exactly what you need for snacks, wraps, grain bowls, or mezze platters.
Homemade Hummus FAQs
Here are answers to a couple of common troubleshooting questions to help your hummus turn out smooth, creamy, and balanced every time.
Grainy hummus usually means the chickpeas were too firm, the skins were still clinging tightly, or the hummus needed more blending time. For the smoothest result, use warm chickpeas, remove most of the skins, and blend a little longer than you think you need to.
Bitterness usually comes from tahini, too much raw garlic, bottled lemon juice, or traces of baking soda that have not been rinsed off well enough. Use a smooth, high-quality tahini, fresh lemon juice, and rinse the chickpeas thoroughly after any baking-soda treatment.
What to Serve with Homemade Hummus
This homemade hummus recipe is incredibly versatile. It’s not just a dip—it also works beautifully as a spread, a snack, or a base for full meals. Here are some of my favorite ways to serve it:
Make a Mezze Platter: Serve it with Mediterranean favorites like tzatziki, tirokafteri, melitzanosalata, whipped feta, and crispy pan-fried saganaki. Add olives, roasted peppers, tomato confit, and warm pita or pita chips for the ultimate appetizer spread.
Salads: Add a spoonful to cucumber-tomato salad, tabbouleh salad, or bright summer corn salad. You can also dollop it onto crisp greens or thin it slightly and use it like a creamy, tangy dressing.
Vegetables: Serve hummus with raw or roasted vegetables like carrots, cucumbers, roasted beets, air-fried broccoli, or sautéed kale. It’s also especially good with pickled vegetables for a bright, tangy contrast.
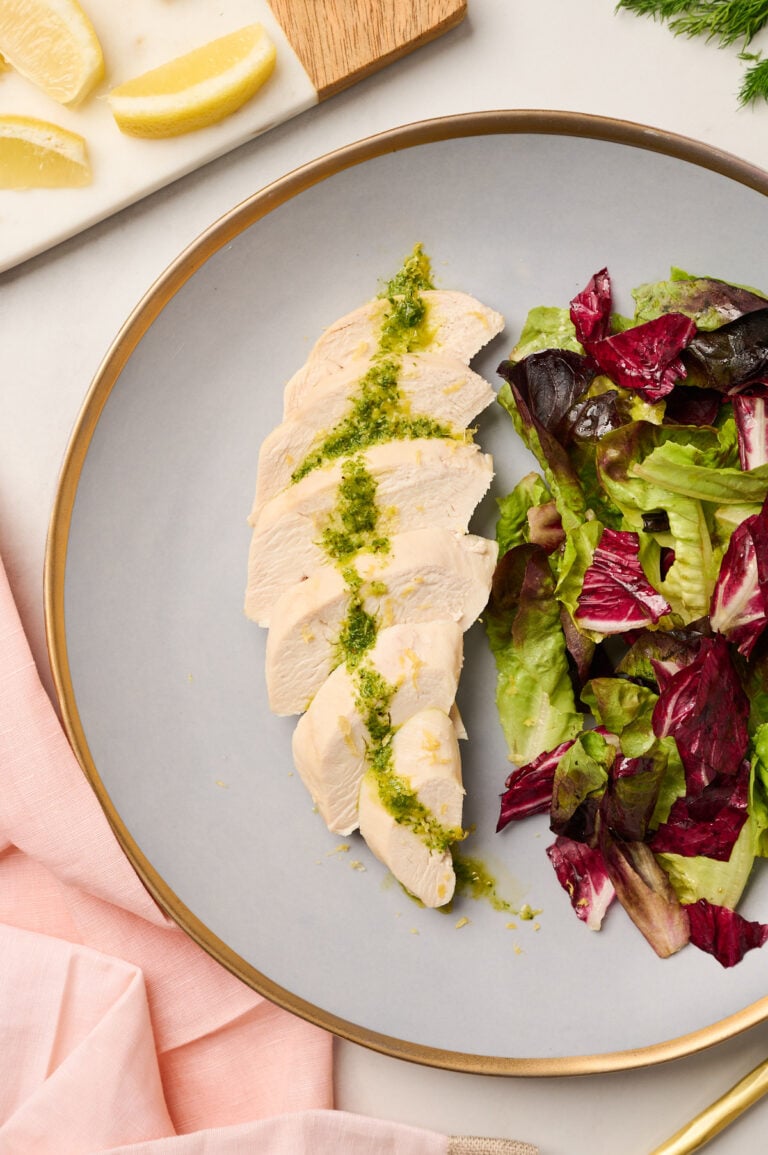
Proteins: Pair it with poached chicken, shredded chicken, grilled lamb, falafel, or pan-seared salmon. It’s also delicious topped with a soft-boiled or jammy egg for a simple, satisfying meal.
Grains, Rice, and Bowls: Spoon it over farro, bulgur, pearl couscous, or rice bowls for added richness, flavor, and plant-based protein. It makes an especially good base for Mediterranean-style grain bowls.
Homemade Hummus Variations
This homemade hummus is easy to customize. For a simple twist, blend one of these flavor variations directly into the base recipe or use them as toppings for extra texture and color.
Roasted Red Pepper Hummus: Blend in roasted red peppers for a slightly sweet, smoky variation with beautiful color.
Herb Hummus: Add fresh parsley, cilantro, dill, or mint for a bright, fresh, garden-inspired version.
Spicy Hummus: Stir in Aleppo pepper, chili flakes, cayenne, chili oil, or chili crunch for heat and depth.
Extra-Garlicky Hummus: Add another clove of garlic or use garlic that has been mellowed in lemon juice for a bolder garlic flavor without too much harshness.
Beet Hummus: Blend in roasted beets for an earthy, subtly sweet hummus with a vibrant pink color.
More Mediterranean Recipes to Pair with Hummus
If you’re building a mezze platter or planning a Mediterranean-inspired meal, these recipes pair especially well with homemade hummus. They add freshness, richness, and contrast to everything from warm pita to grain bowls and appetizer spreads.
- For a bright, herby side, this tabbouleh salad adds freshness and texture alongside creamy hummus.
- If you want something cool and refreshing, this tzatziki sauce pairs beautifully with hummus, vegetables, pita, and grilled meats.
- For extra richness, this silky tahini sauce is delicious drizzled over hummus bowls, roasted vegetables, or falafel-style plates.
- If you want a bold, spicy contrast, this creamy tirokafteri dip adds heat and tang to any mezze spread.