This Authentic Homemade Hummus Recipe is chef-tested, incredibly creamy, and full of bright, balanced flavor. Made with warm chickpeas, tahini, garlic, lemon, and ice cubes for a whipped, airy finish—it’s better than anything store-bought.
As a professional chef, I’ve tested every technique to get the silkiest texture: a precise method for removing skins, warm chickpeas for smooth blending, and ice cubes to aerate and whip the tahini. The result? A lighter, fluffier hummus with bold, authentic flavor in every bite.
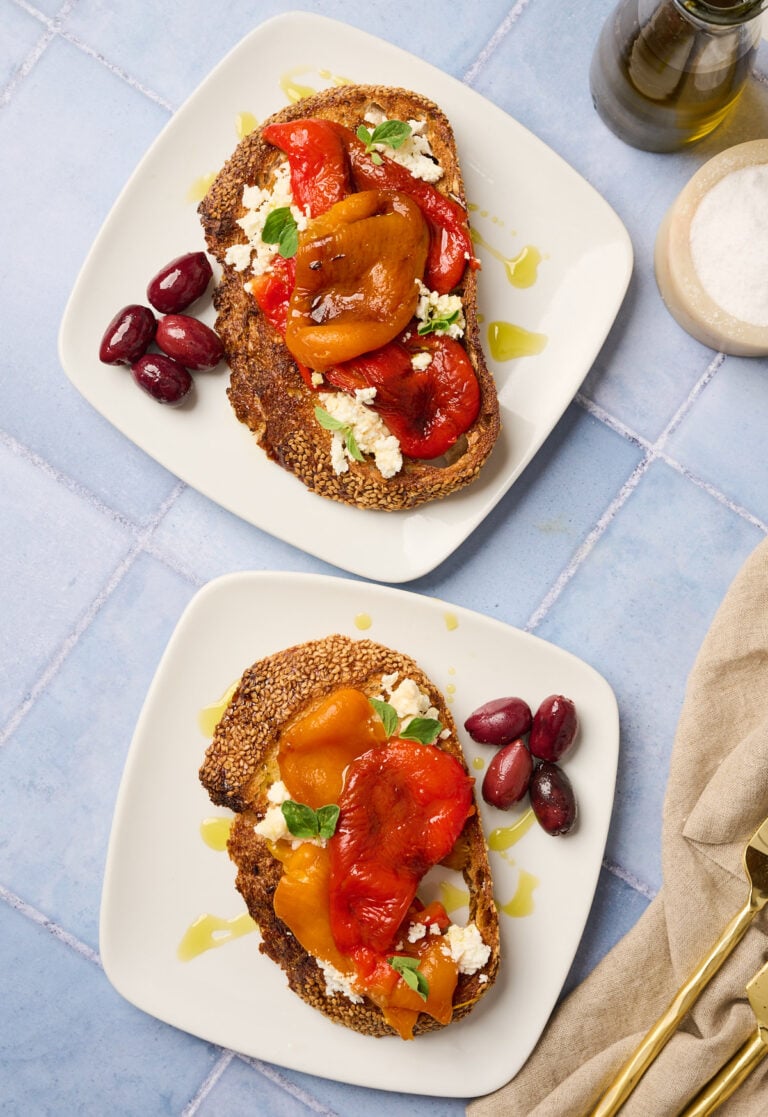
Pair it with warm pita or crisp veggies, or spoon it onto grain bowls and salads. Or, build a Mediterranean mezze platter with tzatziki sauce, tirokafteri, roasted peppers, and tabbouleh. However you serve it, this homemade version always delivers.
Why This Homemade Hummus is Next-Level
What makes this homemade hummus recipe stand out? It’s the technique and not just the ingredients. As a professional chef, I’ve tested every method for getting the smoothest, fluffiest texture possible, and this recipe brings it all together:
- Skin removal, simplified: I walk you through exactly how to remove chickpea skins, whether you’re using canned or cooked-from-scratch beans, for ultra-smooth results.
- Warm-to-cold blending: Start with warm chickpeas for a silky base, then blend in ice cubes to whip air into the tahini and stabilize the emulsion. This combination technique creates a signature, creamy, restaurant-quality finish.
- Fat structure + aeration = fluff: The science-backed ice cube technique works with tahini’s fat to trap air and emulsify everything quickly and evenly.
Once you learn these pro tricks, you’ll never go back to store-bought.
Ingredient Notes
These core ingredients create this homemade hummus recipe that’s exceptionally flavorful and perfectly textured.
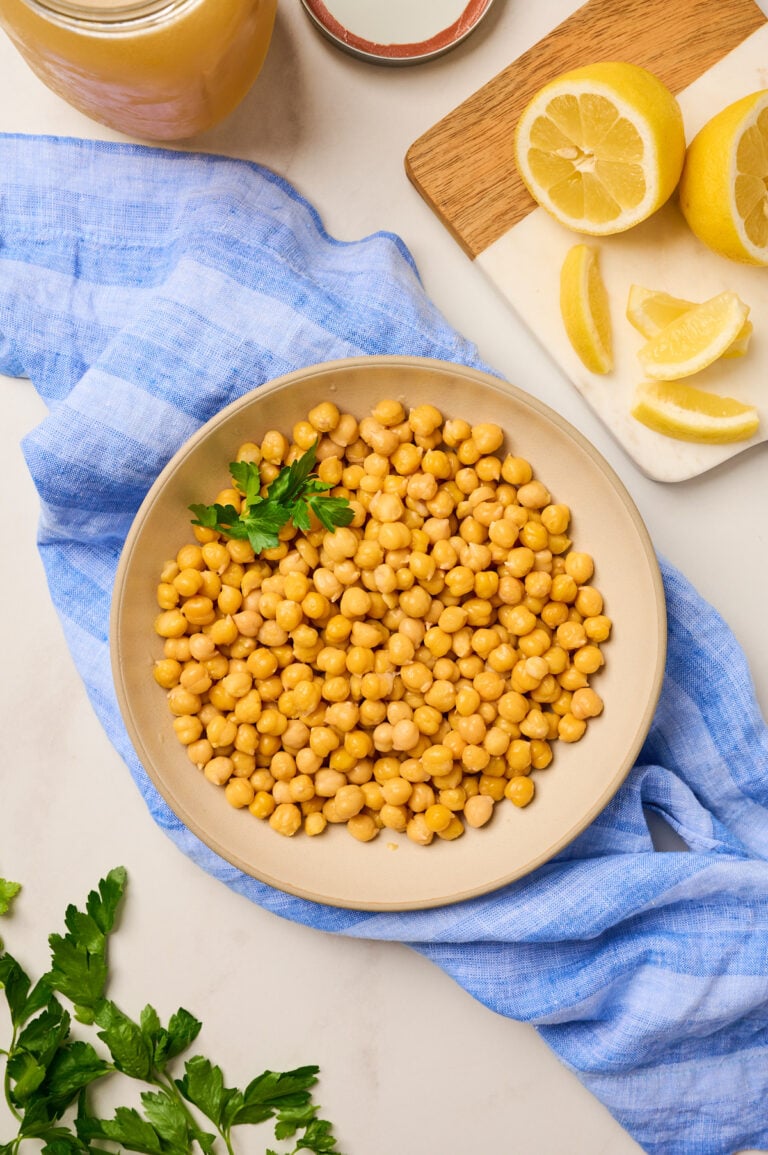
Chickpeas: For the creamiest result, I recommend following how to cook chickpeas from dried. The texture and flavor are significantly superior to canned products. That said, canned chickpeas will work; make sure to rinse them thoroughly. For both options, I walk you through how to remove the skins for extra-smooth results.
Baking Soda (Optional): For an ultra-smooth hummus, baking soda is your best friend. Its alkaline properties help break down the chickpea skins by softening the pectin, making them easier to remove. I provide specific steps for removing chickpea skins for both dried and canned chickpeas.
Tahini: This creamy paste made from ground sesame seeds is essential! Tahini doesn’t just add richness; it’s the fat that creates the emulsion. My ice cube blending technique relies on tahini’s fat structure to whip and trap air, making the hummus lighter and fluffier.
Garlic: Raw garlic brings brightness and bite. To mellow the sharpness, soak minced garlic in lemon juice for 10 minutes. You can then choose to leave it in the acid (for a stronger flavor) or strain it out (for a more subtle flavor) before adding it to the blender. The acidity softens the garlic’s intensity while still infusing the lemon with garlicky depth. If you’re averse to garlic, omit it entirely; your hummus will still taste fantastic!
Lemon Juice: Lemon is the acid that balances the fat from the tahini and rounds out the garlic. Always used freshly squeezed!
Kosher Salt: Brings out the natural sweetness of the chickpeas and ties all the flavors together.
Ice cubes: Helps emulsify the tahini and aerates the mixture. Cold fat (from the tahini) traps air more efficiently, giving you that signature whipped, restaurant-quality texture.
Find the full recipe, including ingredients and directions, below.
How to Make Homemade Hummus (Step by Step)
Here’s how to make ultra-creamy, authentic homemade hummus recipe with tested steps, sensory cues, and options for both canned and cooked-from-scratch chickpeas.
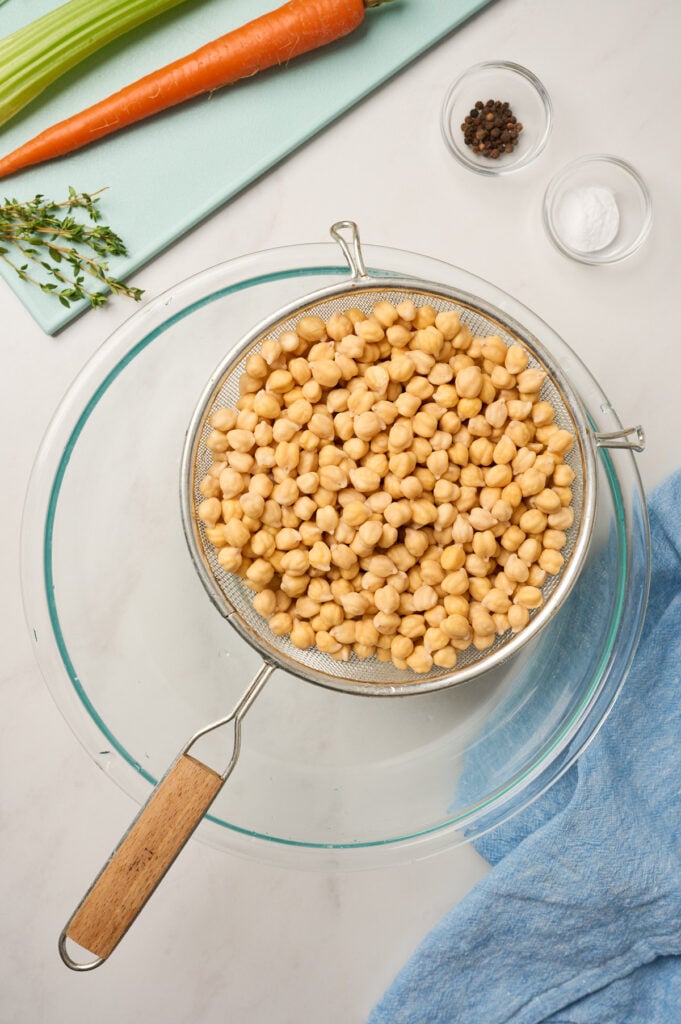
Drain the Chickpeas:
If using canned chickpeas, drain and rinse well, reserving ¼ cup of the can liquid (aquafaba). If using cooked-from-scratch chickpeas, reserve ¼ cup of the cooking liquid. This liquid adds body and depth when blending.
Optional: Set aside ¼ cup of whole chickpeas for garnish.
Remove Chickpea Skins (Optional) But Worth It!
For the smoothest hummus, removing the skins makes a noticeable difference. I’ve tested every method — this one works best:
For cooked chickpeas (from dried):
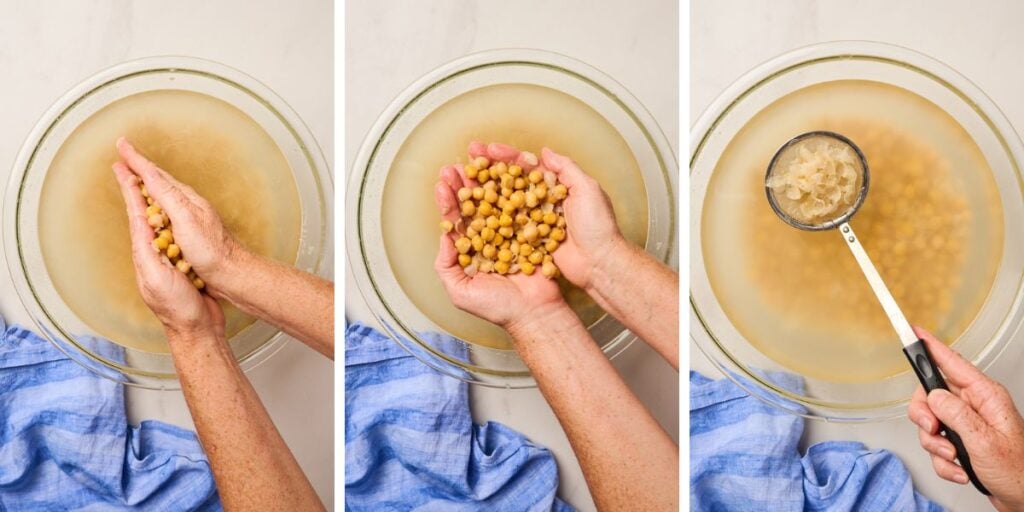
After cooking, place warm chickpeas in a large bowl of lukewarm water. Rub them between your palms to loosen the skins. Repeat this process for 3-4 rounds. Let sit — the skins float, the beans sink. Skim and discard the skins.
For canned chickpeas:
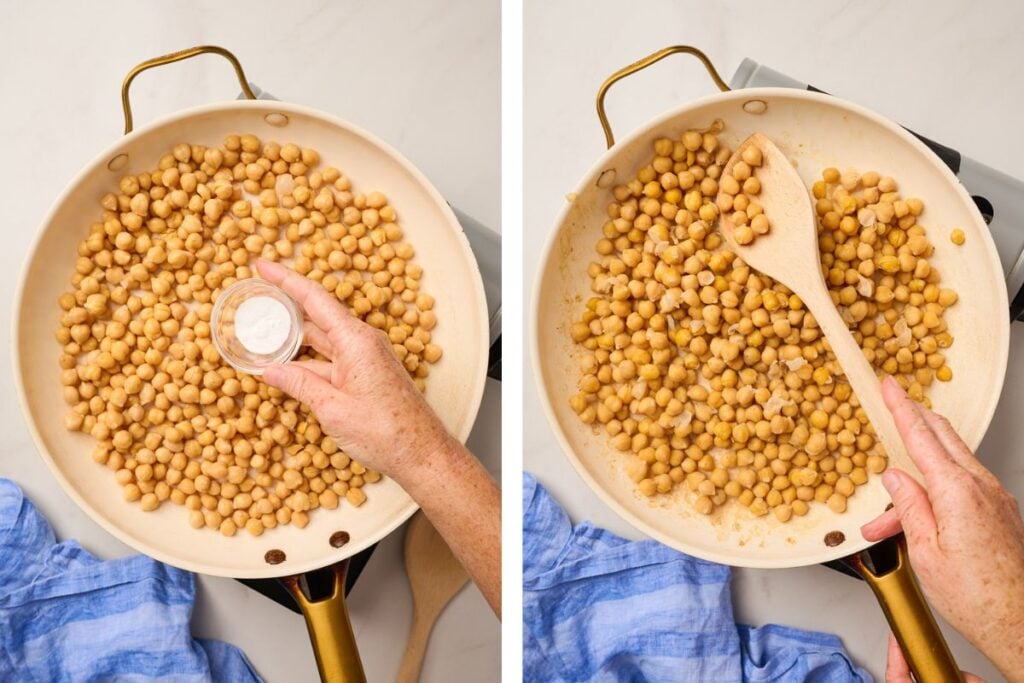
Toss drained chickpeas with 1 tsp baking soda. Warm for 2–3 minutes (pan or microwave) to help the baking soda adhere. Then use the same water-rub-skim method above.
Chef’s Note: You don’t need to get every skin — just most. It’s about smoother texture, not perfection.
Blend Until Smooth (Warm First, Cold Second)
Pro Tip: A high-powered blender (rather than a food processor) can produce a smoother purée thanks to its vortex action and stronger blade motion. If ultra-creamy texture is your goal, a blender is your best bet.
Start with warm chickpeas for the first blend. Whether freshly cooked or gently reheated canned beans, warm chickpeas break down more easily, creating a smoother base. Warm starches are softer and blend into a fluffier, milkshake-like paste — a trick professional kitchens use to get that restaurant-quality texture.
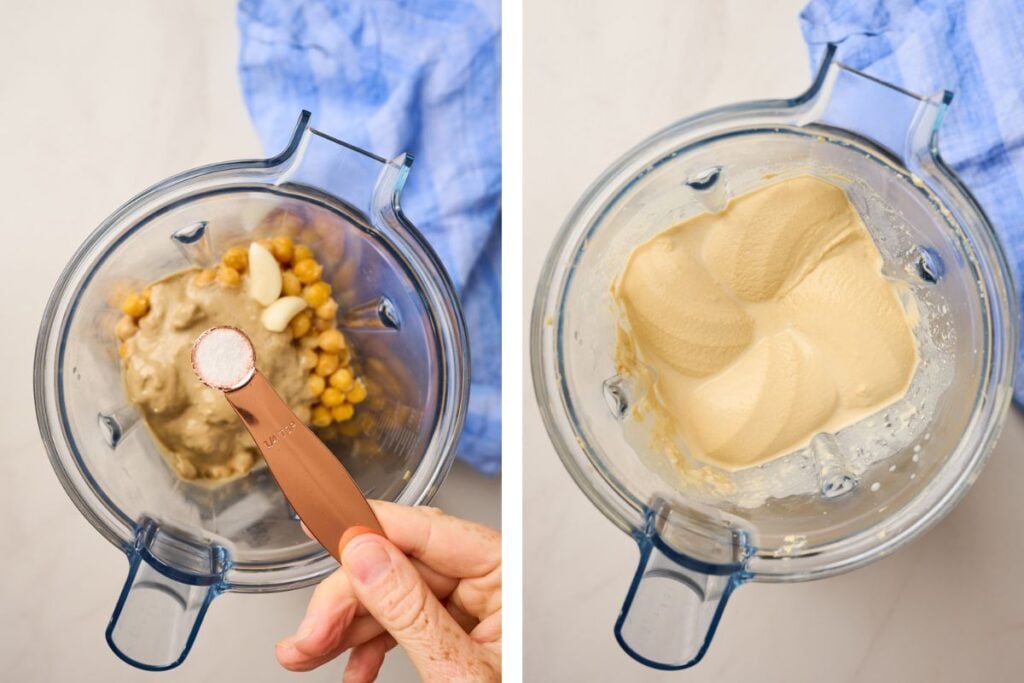
Add 3 cups of warm chickpeas to a food processor or blender with tahini, garlic, lemon juice, reserved liquid, and salt. Blend until completely smooth — then keep going, scraping down sides as needed. That extra 30–60 seconds makes all the difference in creating an ultra-creamy base before introducing the ice.
Why warm first? Cold chickpeas and tahini don’t emulsify as easily. Their fats are more rigid, which can lead to a grainier or uneven texture.
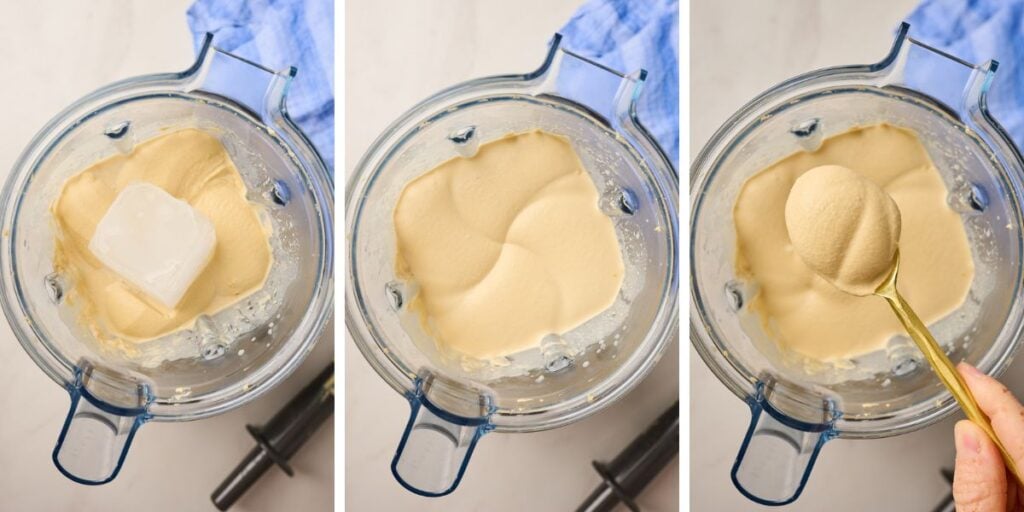
Add Ice Cubes for Whipped Texture:
While the motor is running, drop in 2–3 ice cubes and blend until fully melted and incorporated. This does more than just chill the mixture — it aerates the hummus, emulsifies the tahini, and creates that signature light, fluffy texture.
As the blender runs, its circular motion whips air into the mixture. When tahini is cold, its fats firm up, forming a more stable structure that traps those air bubbles. This leads to smaller, more uniform bubbles and a lighter, smoother hummus.
Check Texture and Season to Taste:
Once your hummus is fully blended, taste and adjust. If it needs more acidity or salt, add a splash of lemon juice or a pinch more of kosher salt. For a thinner consistency, blend in another ice cube or a spoonful of cold water. Want it thicker? Add a touch more tahini and blend again until smooth.
Garnish and Serve:
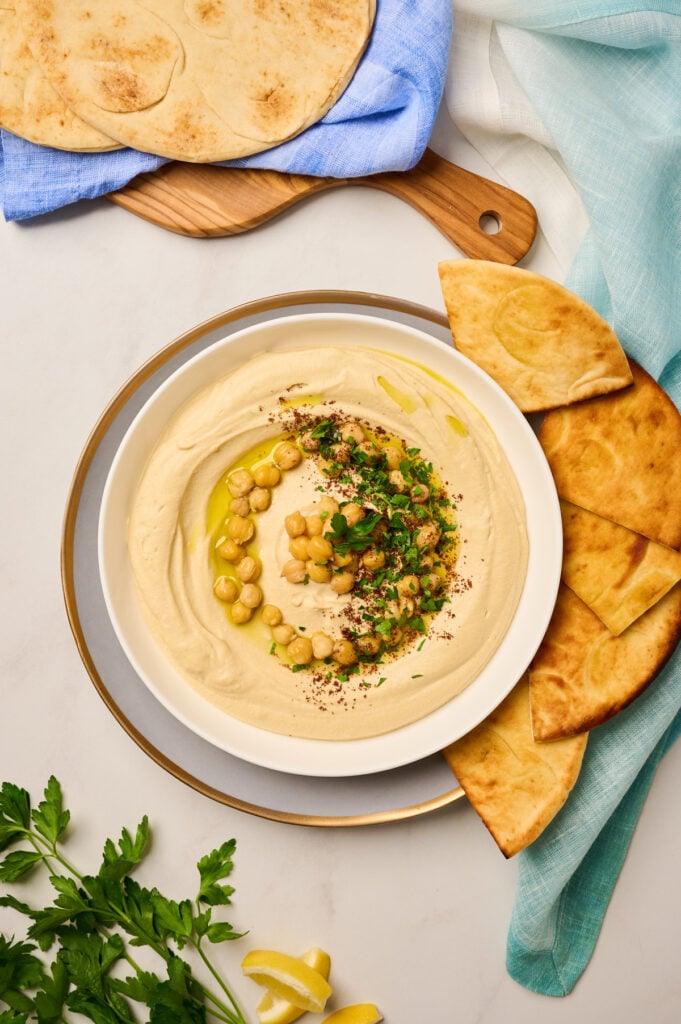
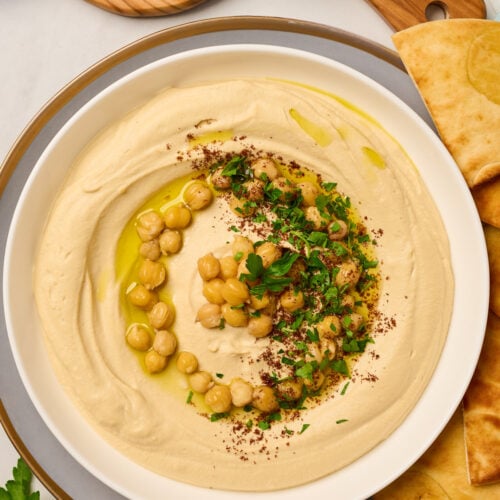
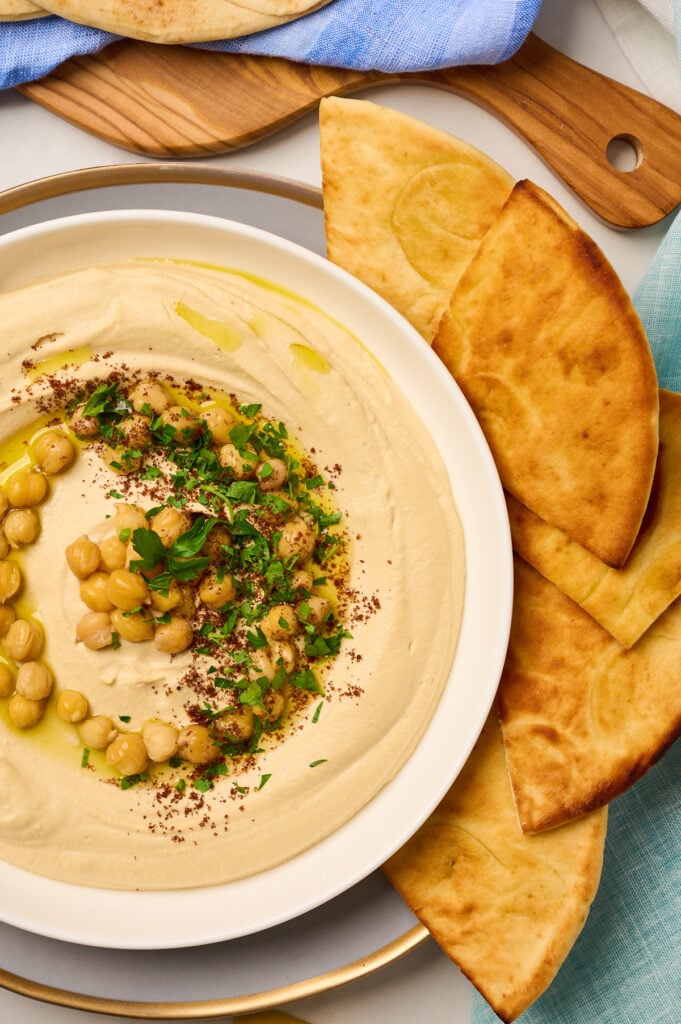
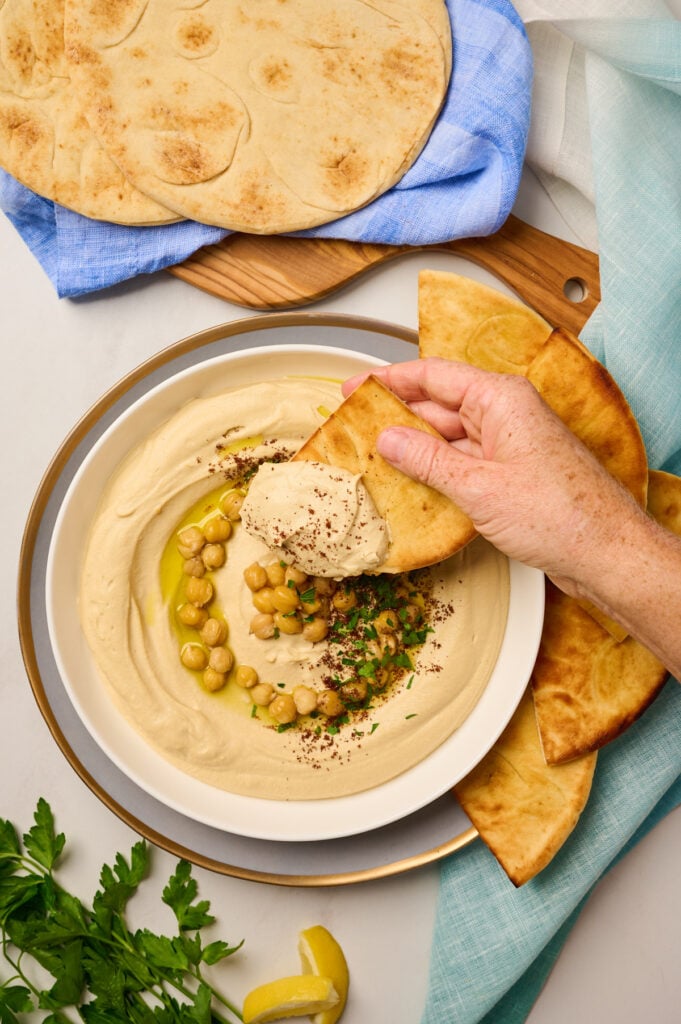
Transfer your hummus to a serving bowl. Drizzle with olive oil and top with the reserved chickpeas, a sprinkle of sumac or Aleppo pepper, and fresh parsley. Serve with warm pita, pita chips, or raw vegetables — and enjoy every creamy, fluffy bite.
Authentic Homemade Hummus Recipe
Equipment
- Optional Large Sauté Pan
- Optional Wooden Spoon
- Optional Large Bowl
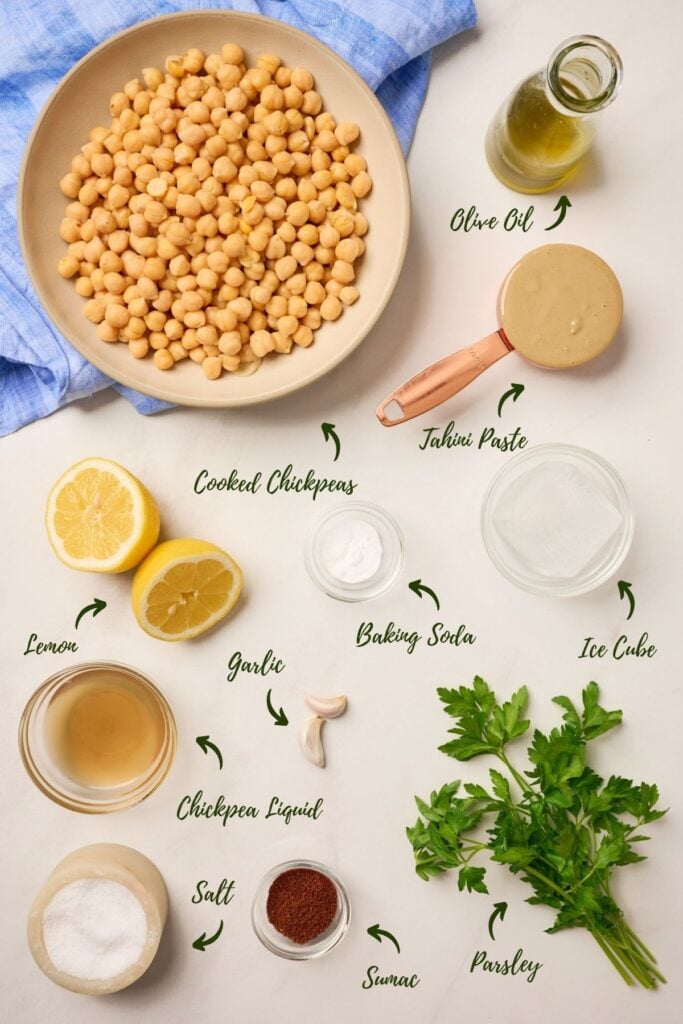
Ingredients
- 1 1/2 cups cooked chickpeas (or 1 16 oz can, drained and rinsed)
- 1/4-1/2 cup chickpea cooking liquid or aquafaba
- 1 tsp baking soda (optional, for skin removal)
- 1/2 cup tahini (smooth and pourable)
- 1-2 cloves garlic
- 3 tbsp fresh lemon juice
- 1/4 tsp kosher salt, more to taste
- 2 small ice cubes (or 1 large)
- Olive oil for drizzling
- Optional Garnishes: sumac or Aleppo pepper, chopped parsley, or tahini sauce
Instructions
Prep the Chickpeas
- If using canned: Drain, rinse, and reserve ¼ cup of the can liquid (aquafaba).If using freshly cooked: Reserve ¼ cup of cooking liquid.
Optional – Remove Skins for a Creamier Texture:
- From canned: Toss drained chickpeas with 1 tsp baking soda. Warm for 2–3 minutes in a skillet or microwave. Transfer to a bowl of lukewarm water and rub vigorously between your hands. Repeat 4-5 times. Skim off floating skins. Rinse and drain.From dried-to-cooked: Follow my how to cook chickpeas guide using baking soda while cooking, then repeat the same water-rub-skim process above.Optional: Set aside ¼ cup whole chickpeas for garnish.
Blend the Hummus Base
- Pro Tip: A high-powered blender produces a silkier purée than most food processors.Use warm chickpeas (heat on stove or microwave) for the first blend — warm starches and fats emulsify better.
- Add chickpeas, tahini, lemon juice, garlic, salt, and ¼ cup reserved liquid to a food processor or high-speed blender. Blend until smooth and creamy, scraping down sides as needed. Continue blending an extra 30–60 seconds for best texture.
Add Ice Cubes for Whipped Texture
- With the motor running, add 2–3 ice cubes. Blend until melted and fully incorporated. This chills and aerates the tahini, stabilizing fat molecules and whipping in tiny air bubbles — the secret to light, fluffy, restaurant-style hummus.
Taste and Adjust
- Taste your hummus. Want it thinner? Add more cold water or a bit more cooking liquid. Too thin? Blend in another spoonful of tahini. Adjust salt and lemon juice to your liking.
Garnish and Serve
- Transfer hummus to a serving bowl. Use the back of a spoon to create swoops for olive oil to pool into. Top with reserved chickpeas, chopped parsley, sumac, or your favorite garnishes. Serve warm or room temp with pita, raw veggies, or as part of a mezze platter.
Notes
- Fresh is best: Homemade cooked chickpeas yield creamier results than canned. Here’s how I cook them from scratch →
- Flavor to taste: Start with the base amounts, then season your hummus to suit your palate.
- Garnish creatively: Try za’atar, toasted seeds, chili oil, or tapenade for next-level flavor.
- Serving Tip: Serve slightly warm for an ultra-silky texture and enhanced flavor.
Nutrition
Chef’s Pro Tips
Once you’ve nailed the base recipe, these pro tips will help you elevate the texture, flavor, and presentation:
Switch to a high-speed blender: You’ve likely used a food processor before, but if you want ultra-smooth, whipped hummus with zero graininess, consider using a high-speed blender. The powerful vortex action and finer blades emulsify the tahini more thoroughly, creating an incredibly velvety texture.
Blend warm, finish cold: Start blending while the chickpeas are still warm for a smoother, fluffier purée. Then, add ice cubes at the end to whip in the air and stabilize the emulsion. This warm-then-cold method is the secret to that restaurant-quality texture.
Think beyond olive oil: Try swirling in basil vinaigrette, harissa, or finely minced fresh herbs for an extra burst of flavor. Or try topping with dukkah, sumac, Aleppo pepper, za’atar, chili crisp, roasted chickpeas, pine nuts, or pickled veggies. It’s an easy way to add crunch, contrast, and a wow factor.
Serve slightly warm: While most people chill hummus, serving it warm enhances the flavors, making it feel more decadent and luxurious.
Variations
All of these additions can either be blended directly into your homemade hummus recipe or chopped and used as flavorful garnishes — get creative!
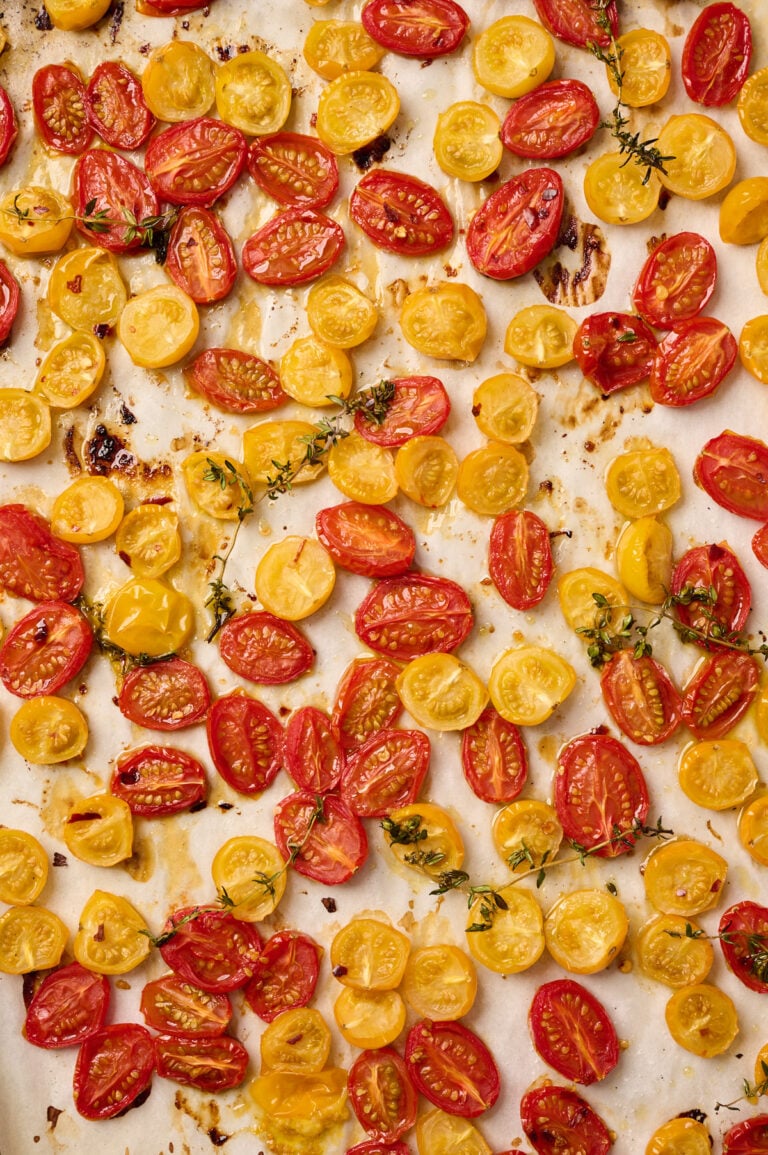
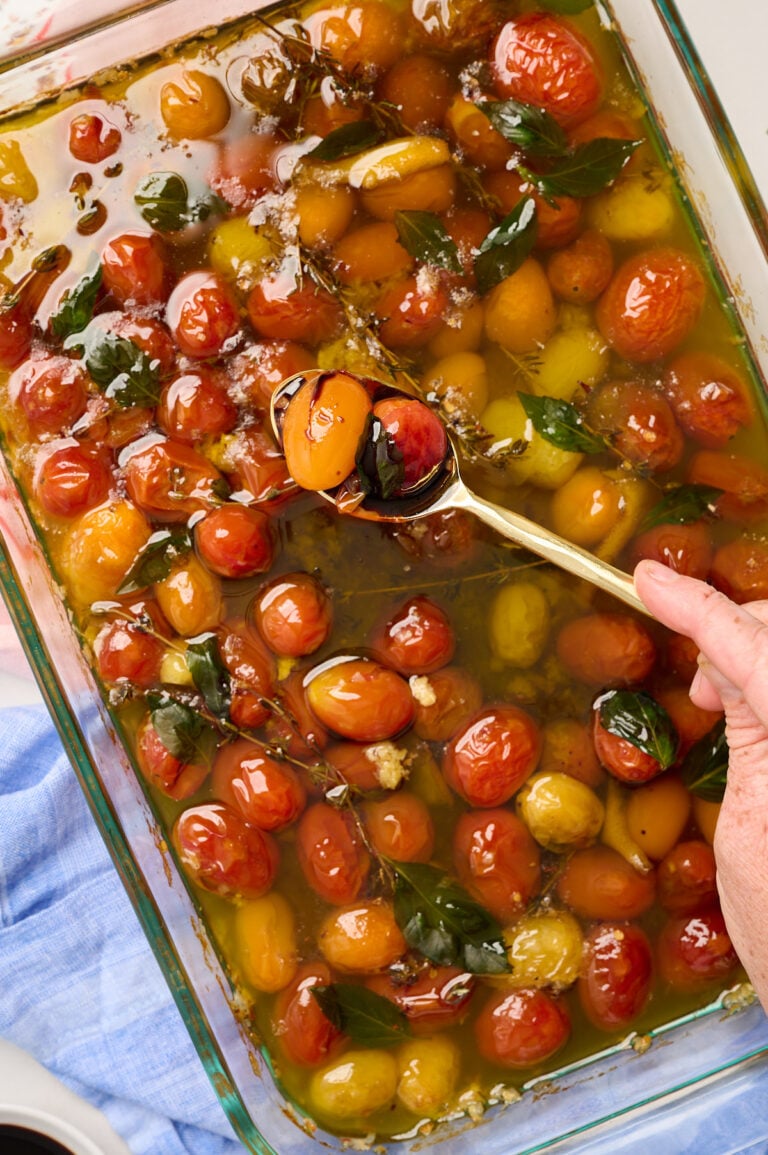
Sweet Additions (Roasted for Best Flavor): Roasted red peppers, sweet potatoes, pumpkin or butternut squash, tomatoes, or beets.
Smoky Flavors: Roasted corn, smoked paprika, cumin, coriander, or black beans for subtle warmth and depth.
Creamy Boosters: Avocado, white cannellini beans, gigante beans, lupini beans, or edamame. Blend in for extra richness and body.
Salty & Savory Swirls: Try chopped Kalamata or Castelvetrano olives, spoonfuls of pesto, or olive tapenade for bold, briny notes.
Bring the Heat: Stir in chili flakes, cayenne, chili oil, or chili crunch, or top with crispy spiced chickpeas for texture and spice.
Nutty & Textural: Garnish with toasted walnuts, pine nuts, pistachios, almonds, hazelnuts, or pumpkin seeds for crunch and contrast.
Umami Punch: Blend in a touch of white or yellow miso, gochujang, or even anchovy paste to deepen flavor.
Fresh Herb Accents: Top with or blend in fresh herbs like parsley, cilantro, dill, basil, mint, or tarragon for bright, garden-fresh flavor.
What to serve with Homemade Hummus
This homemade hummus recipe is endlessly versatile. It isn’t just a dip; it’s perfect to have as a base for full meals. Here are some of my favorite pairings:
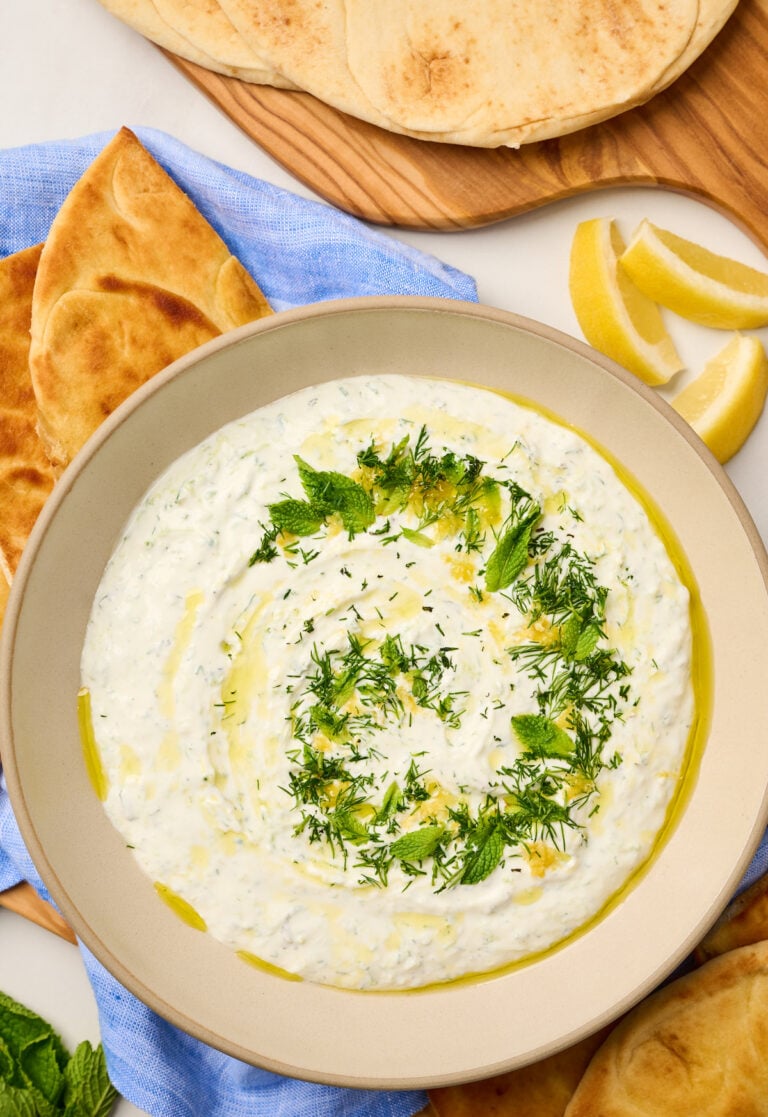
Make a Mezze Platter: Serve with Mediterranean favorites like tzatziki sauce, tirokafteri, melitzanosalata (eggplant dip), whipped feta, and crispy pan-fried saganaki. Add olives, roasted peppers, tomato confit, and warm pita or pita chips for the ultimate appetizer spread.
Salads: Add a spoonful to cucumber-tomato salad or this tabbouleh.
Vegetables: Dip raw or roasted veggies, such as air-fried broccoli, roasted beets, or top with roasted tomatoes or sautéed kale. It’s also delicious with pickled vegetables for a tangy contrast.
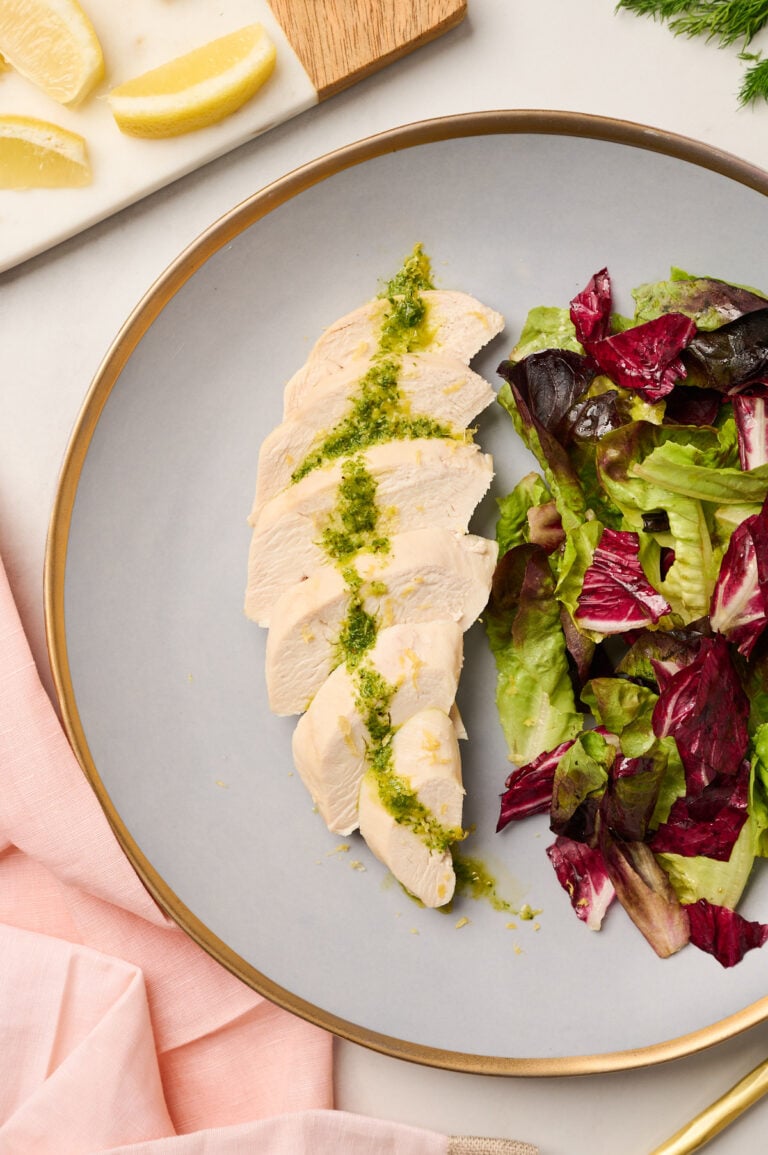
Proteins: Pair with poached chicken, shredded chicken, grilled lamb, falafel, or pan-seared salmon. It’s also excellent topped with a soft-boiled or jammy egg.
Grains, Rice & Pasta Bowls: Dollop over farro, bulgur, pearl couscous, or rice. It adds richness, protein, and flavor to any bowl.
How to Store and Freeze
This hummus keeps beautifully, making it great for meal prep or make-ahead entertaining.
Refrigerator: Store in an airtight container for 5–7 days. Stir well before serving and finish with a drizzle of olive oil to revive the flavor and texture.
Freezer: You can freeze hummus, though the texture may shift. Thaw in the fridge, then stir well or re-blend to restore creaminess.
Pro Tip: Freeze in small portions using silicone ice cube trays or mini containers — easy to thaw just what you need for snacks, wraps, or grain bowls.
More Favorite Dips and Sauces to Try
Looking for bold, bright, and creamy recipes to elevate your meals? These reader-favorite dips and dressings pair beautifully with Mediterranean platters, roasted veggies, bowls, and proteins:
- Tirokafteri
- Tzatziki Sauce
- Tahini Sauce
- Dill Sauce
- Pistachio Pesto
- Guacamole
- Mango Salsa
- Peanut Sauce
- Nuoc Cham Sauce